Este contenido no está disponible en el idioma seleccionado.
10.3. Establishing Connections
10.3.1. Establishing a Wired (Ethernet) Connection
nm-connection-editor &
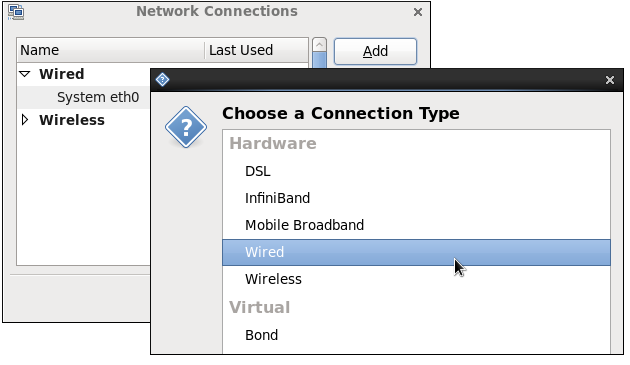
~]$ nm-connection-editor &Figure 10.6. The Network Connections window showing the newly created System eth0 connection
Figure 10.7. Selecting a new connection type from the "Choose a Connection Type" list
Note
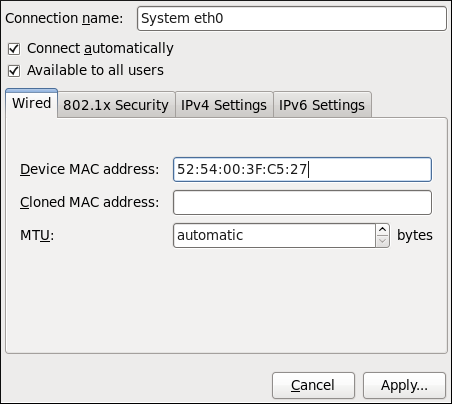
Figure 10.8. Editing the newly created Wired connection System eth0
Configuring the Connection Name, Auto-Connect Behavior, and Availability Settings
- Connection name — Enter a descriptive name for your network connection. This name will be used to list this connection in the Wired section of the Network Connections window.
- Connect automatically — Check this box if you want NetworkManager to auto-connect to this connection when it is available. See Section 10.2.3, “Connecting to a Network Automatically” for more information.
- Available to all users — Check this box to create a connection available to all users on the system. Changing this setting may require
rootprivileges. See Section 10.2.4, “User and System Connections” for details.
Configuring the Wired Tab
automatic. These defaults will suffice unless you are associating a wired connection with a second or specific NIC, or performing advanced networking. In such cases, see the following descriptions:
- MAC Address
- Network hardware such as a Network Interface Card (NIC) has a unique MAC address (Media Access Control; also known as a hardware address) that identifies it to the system. Running the
ip addrcommand will show the MAC address associated with each interface. For example, in the followingip addroutput, the MAC address for the eth0 interface (which is52:54:00:26:9e:f1) immediately follows thelink/etherkeyword:Copy to Clipboard Copied! Toggle word wrap Toggle overflow A single system can have one or more NICs installed on it. The MAC address field therefore allows you to associate a specific NIC with a specific connection (or connections). As mentioned, you can determine the MAC address using theip addrcommand, and then copy and paste that value into the MAC address text-entry field.The cloned MAC address field is mostly for use in such situations were a network service has been restricted to a specific MAC address and you need to emulate that MAC address. - MTU
- The MTU (Maximum Transmission Unit) value represents the size in bytes of the largest packet that the connection will use to transmit. This value defaults to
1500when using IPv4, or a variable number1280or higher for IPv6, and does not generally need to be specified or changed.
Saving Your New (or Modified) Connection and Making Further Configurations
- port-based Network Access Control (PNAC), click the 802.1X Security tab and proceed to Section 10.3.9.1, “Configuring 802.1X Security”;
- IPv4 settings for the connection, click the IPv4 Settings tab and proceed to Section 10.3.9.4, “Configuring IPv4 Settings”; or,
- IPv6 settings for the connection, click the IPv6 Settings tab and proceed to Section 10.3.9.5, “Configuring IPv6 Settings”.


