Questo contenuto non è disponibile nella lingua selezionata.
9.8. Import Metadata From Text File
9.8.1. Import Metadata From Text File
Copia collegamentoCollegamento copiato negli appunti!
The Teiid Designer provides various import options for parsing comma delimited text file metadata into models. This is accomplished via the Import > Teiid Designer > Designer Text File >> Source or View Models option.
- In Teiid Designer, Click File > Import action and then click Import...
- Select the import option Teiid Designer > Designer Text File >> Source or View Models and click Next>.
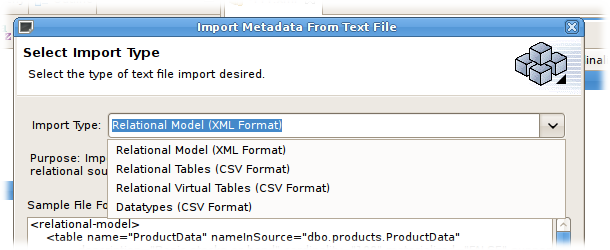
- Select an import type from the drop-down menu shown below.
Figure 9.29. Import Wizard
These steps are required for each type are defined below:
- Relation Model Text Import
- Relational Table Text Import
- Virtual Table Text Import
- Datatype Table Text Import
9.8.2. Import Relational Model (XML Format)
Copia collegamentoCollegamento copiato negli appunti!
To create relational tables from imported XML text file metadata, perform steps 1 to 3 from the Import Metadata from Text File section and then perform following steps:
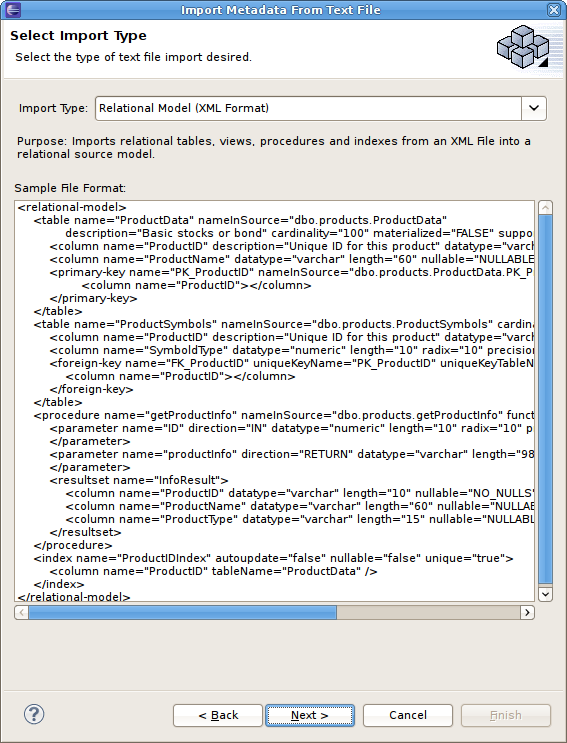
- Select the Relational Model (XML Format) import type, then click Next >.
Figure 9.30. Select Import Type - Relational Model (XML Format)
- On the next page, select the XML file on your local file system via the button. Select a target model to which the imported relational objects will be added via the second button. The dialog allows selecting an existing relational model or creating a new model. Note the contents of your selected XML file will be display in the File Contents viewer. Click Finish.
Figure 9.31. Select Source Text File and Target Relational Model Page
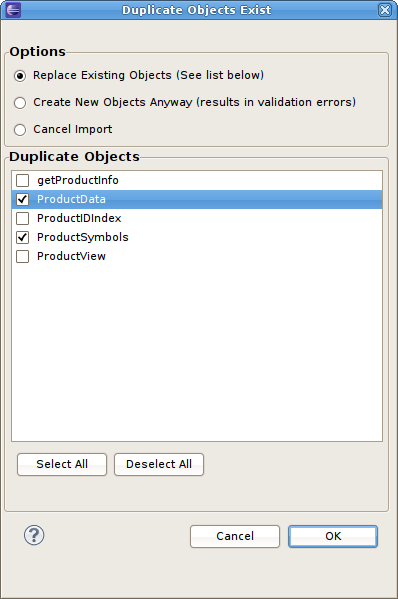
- If the target model contains named children (tables, views, procedures) that conflict with the objects being imported, a dialog will be displayed giving you options on how to proceed including: replacing specific existing objects, creating new same named objects or cancel import entirely.
Figure 9.32. Duplicate Objects Dialog

9.8.3. Import Relational Tables (CSV Format)
Copia collegamentoCollegamento copiato negli appunti!
To create relational tables from imported text file metadata, perform steps 1 to 3 from the Import Metadata from Text File section and then perform following steps:
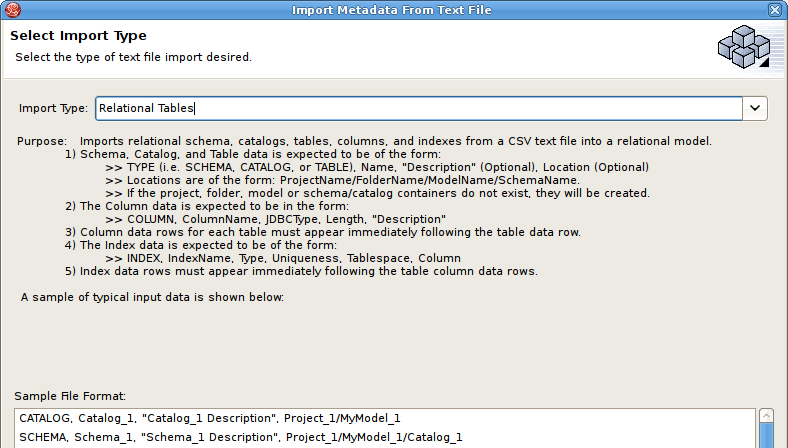
- Select the Relational Tables (CSV Format) import type, then click Next >.
Figure 9.33. Select Import Type - Relational Tables (CSV Format)
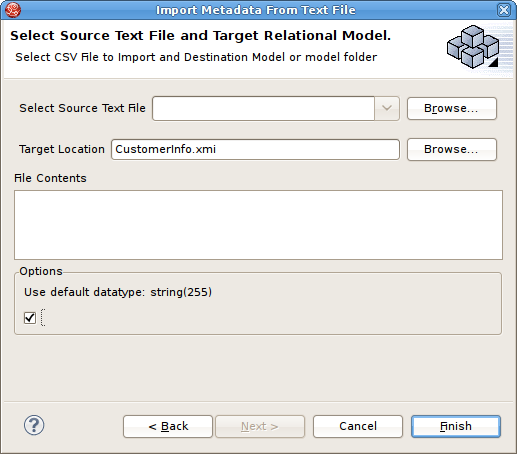
- In the next page, you'll need to provide a source text file containing the metadata formatted to the specifications on the previous page.
Figure 9.34. Select Source Text File and Target Relational Model
- Select an existing relational model as the target location for your new relational components using the Browse... button to open the Relational Model Selector dialog. Select a relational model from your workspace or specify a unique name to create a new model.
- Select any additional options and click Finish.
9.8.4. Import Relational View Tables (CSV Format)
Copia collegamentoCollegamento copiato negli appunti!
To create relational virtual tables from imported text file metadata, perform steps 1 to 3 from the Import Metadata from Text File section and then perform following steps:
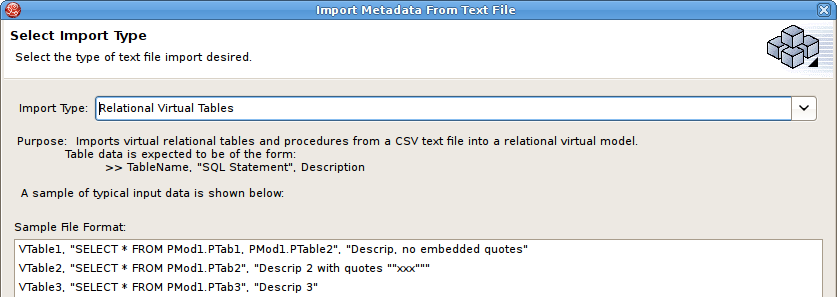
- Select the Relational Virtual Tables (CSV Format) import type, then click Next >.
Figure 9.35. Select Import Type - Relational Virtual Tables (CSV Format)
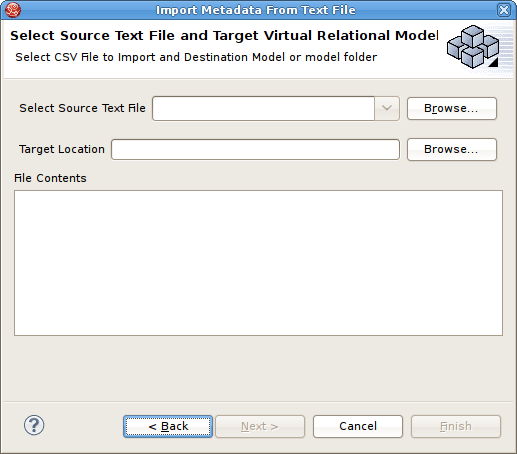
- In the next page, you'll need to provide a source text file containing the metadata formatted to the specifications on the previous page.
Figure 9.36. Select Source Text File and Target Virtual Relational Model
- Select an existing relational virtual model as the target location for your new model components using the Browse... button to open the Virtual Model Selector dialog. Select a virtual relational model from your workspace or specify a unique name to create a new model.
- Click Finish.
9.8.5. Import Datatypes (CSV Format)
Copia collegamentoCollegamento copiato negli appunti!
To create datatypes from imported text file metadata, perform steps 1 to 3 from the Import Metadata from Text File section and then perform following steps:
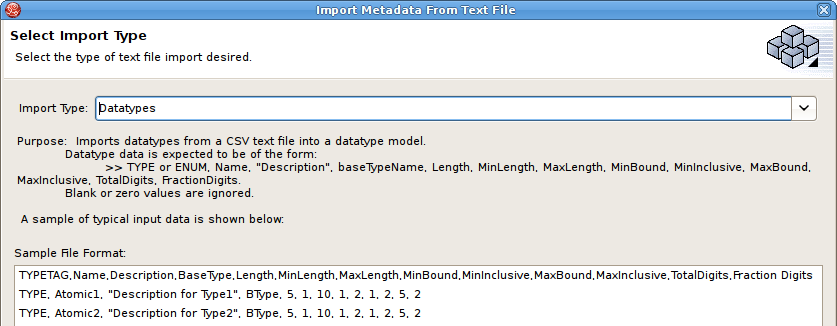
- Select the Datatypes (CSV Format) import type, then click Next >.
Figure 9.37. Select Import Type - Datatypes (CSV Format)
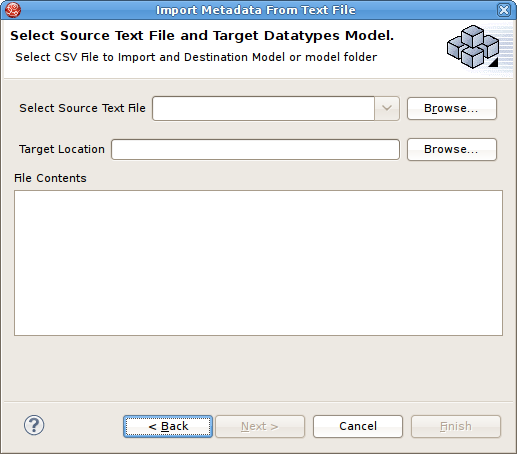
- In the next page, you'll need to provide a source text file containing the metadata formatted to the specifications on the previous page.
Figure 9.38. Select Source Text File and Datatypes Model
- Select an existing datatype model as the target location for your new model components using the button to open the Datatypes Model Selector dialog. Select a datatypes model from your workspace or specify a unique name to create a new model.
- Select any additional options and click Finish.