Questo contenuto non è disponibile nella lingua selezionata.
12.2. Relational View Modeling
12.2.1. Create Materialized Views
Copia collegamentoCollegamento copiato negli appunti!
For any relational view table you can enable its materialized view option by setting the Materialized property to TRUE and setting the Materialized Table reference, as shown in the figure below. Note that you are required to have already created your relational tables.
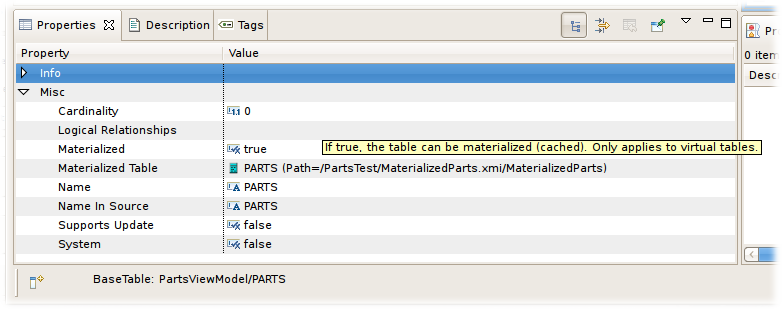
Figure 12.11. Materialized Table Properties
Teiid Designer includes a feature to assist in quickly creating materialized relational tables based on your existing view tables.
To create materialized views:
- Right-click on one or more view tables in the Model Explorer View and select the Modeling > Create Materialized Views action.
Figure 12.12.
- In the Create Materialized View Model dialog specify or select a target relational model for your generated relational tables.
Figure 12.13.
- Selecting the Browse ... button displays the Relational Model Selector dialog where you select an existing relational model or specify a unique name for a new model.
Figure 12.14.
- Click OK to create relational tables corresponding to your selected view tables and automatically set the Materialized property to TRUE and the Materialized Table reference value to your newly generated table.


When finished your view tables will be configured with their new materialized properties and the corresponding relational tables will be shown in their package diagram.
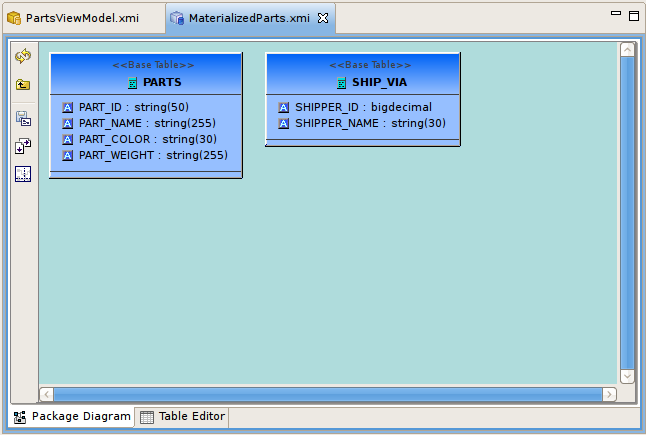
Figure 12.15. Materialized Table Properties
12.2.2. Create Relational View Table Wizard
Copia collegamentoCollegamento copiato negli appunti!
You can create relational view tables by clicking New Child > Table... action. This action also includes creating view tables with its target columns and SQL transformation.
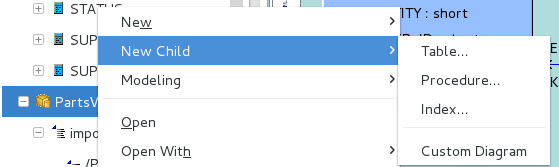
Figure 12.16. New View Table Wizard Action
Running the action will display the Create Relational View Table wizard. The wizard page contains tabbed panels representing the various properties and components that make up the possible definition of a relational view table. Enter your table name, define the desired columns and specify the SQL transformation, then click OK.
This wizard is designed to provide feedback as to the completeness of the relational view table information, as well as the validation state of the table and its components. Note that although errors or warnings may be displayed during editing, the wizard is designed to allow finishing even if the table definition is incomplete.
The first tab labeled Properties contains the input for the simple table properties including name and supports update.
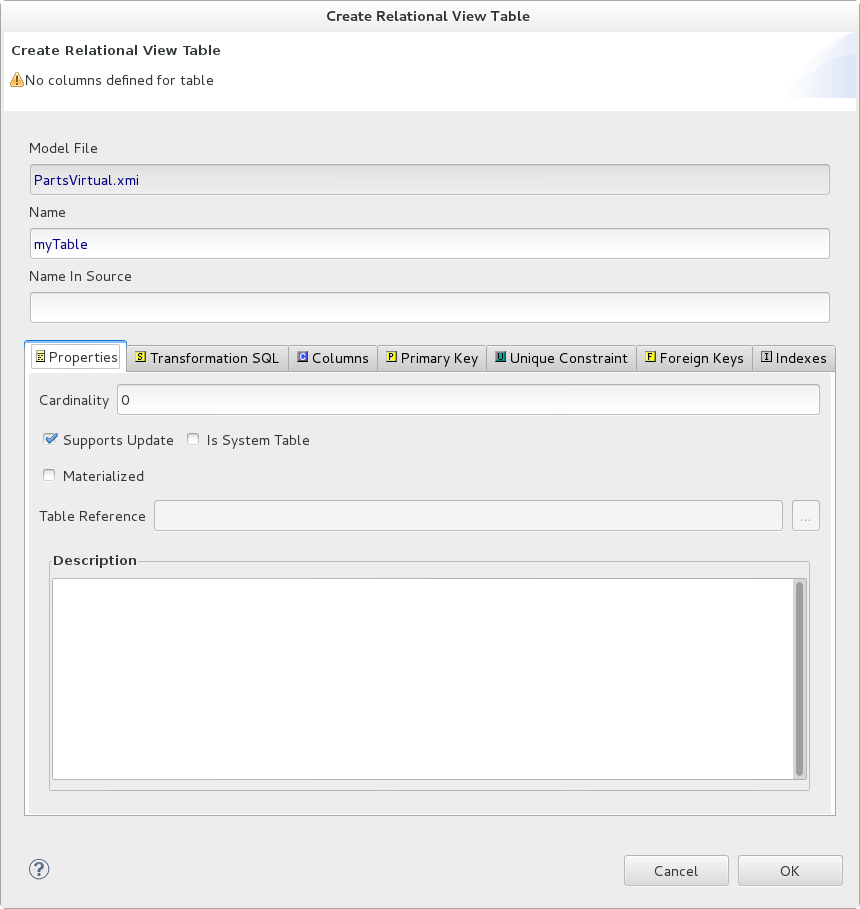
Figure 12.17. Properties Tab
The Columns tab allows creation and editing of basic relational columns. This includes adding, deleting or moving columns as well as changing the name, datatype and length properties.

Figure 12.18. Columns Tab
The Transformation SQL tab allows editing of the SQL Transformation for the relational view. The desired SQL can be entered directly into the text area or a SQL Template may be selected by clicking the Select SQL Template button.
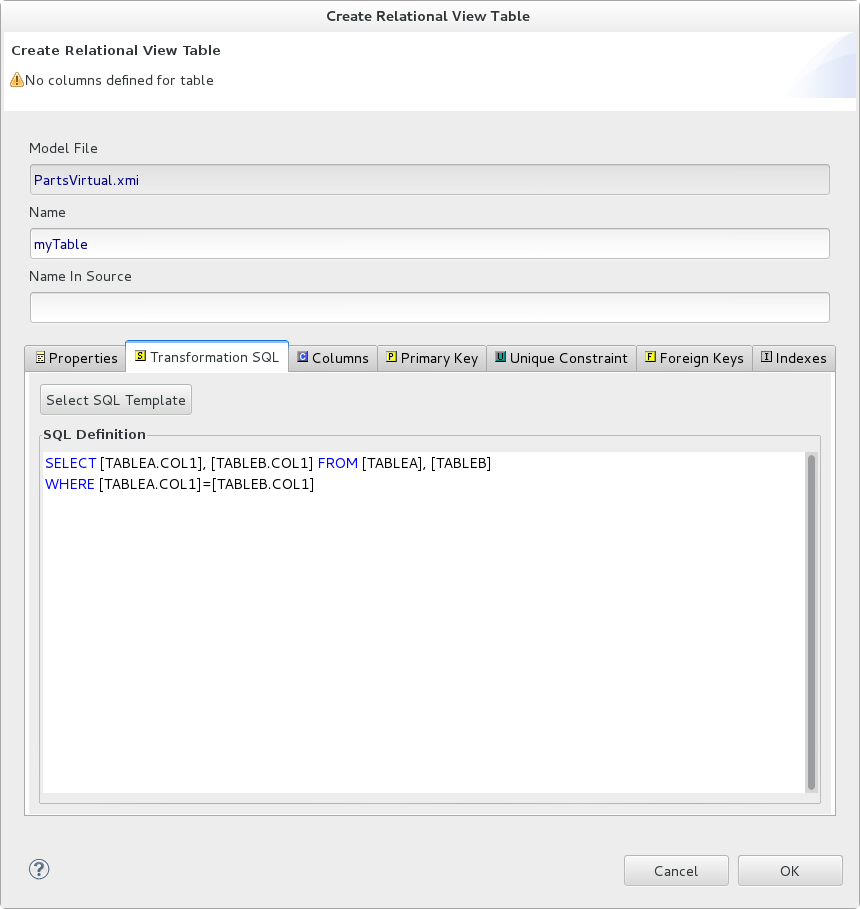
Figure 12.19. Transformation SQL Tab
If the Select SQL Template button is selected on the Transformation SQL tab, the Choose a SQL Template dialog is displayed.

Figure 12.20. SQL Templates Dialog
A number of common SQL templates may be chosen using the dialog. Depending on usage context, the PROCEDURES tab may also be available in addition to the SELECT queries tab. The SQL Template dialog can also be accessed in the Transformation Editor, from the right-click context menu.