17.7. Establishing a Wireless Connection
Wireless Ethernet devices are becoming increasingly popular. The configuration is similar to the Ethernet configuration except that it allows you to configure settings such as the SSID and key for the wireless device.
To add a wireless Ethernet connection, follow these steps:
- Click the Devices tab.
- Click the button on the toolbar.
- Select Wireless connection from the Device Type list and click .
- If you have already added the wireless network interface card to the hardware list, select it from the Wireless card list. Otherwise, select Other Wireless Card to add the hardware device.
Note
The installation program usually detects supported wireless Ethernet devices and prompts you to configure them. If you configured them during the installation, they are displayed in the hardware list on the Hardware tab. - If you selected Other Wireless Card, the Select Ethernet Adapter window appears. Select the manufacturer and model of the Ethernet card and the device. If this is the first Ethernet card for the system, select eth0; if this is the second Ethernet card for the system, select eth1 (and so on). The Network Administration Tool also allows the user to configure the resources for the wireless network interface card. Click to continue.
- On the Configure Wireless Connection page as shown in Figure 17.12, “Wireless Settings”, configure the settings for the wireless device.
Figure 17.12. Wireless Settings
- On the Configure Network Settings page, choose between DHCP and static IP address. You may specify a hostname for the device. If the device receives a dynamic IP address each time the network is started, do not specify a hostname. Click to continue.
- Click on the Create Wireless Device page.
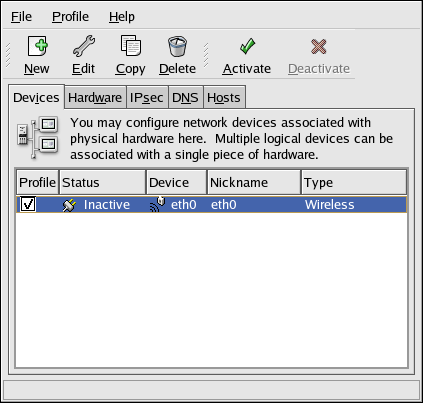
After configuring the wireless device, it appears in the device list as shown in Figure 17.13, “Wireless Device”.
Figure 17.13. Wireless Device
Be sure to select => to save the changes.
After adding the wireless device, you can edit its configuration by selecting the device from the device list and clicking . For example, you can configure the device to activate at boot time.
When the device is added, it is not activated immediately, as seen by its Inactive status. To activate the device, select it from the device list, and click the button. If the system is configured to activate the device when the computer starts (the default), this step does not have to be performed again.

