Chapter 17. Project Signing and Verification
Project signing and verification lets you sign files in your project directory, then verify whether or not that content has changed in any way, or files have been added or removed from the project unexpectedly. To do this, you require a private key for signing and a matching public key for verifying.
For project maintainers, the supported way to sign content is to use the ansible-sign utility, using the command-line interface (CLI) supplied with it.
The CLI aims to make it easy to use cryptographic technology such as GNU Privacy Guard (GPG) to validate that files within a project have not been tampered with in any way. Currently, GPG is the only supported means of signing and validation.
Automation controller is used to verify the signed content. After a matching public key has been associated with the signed project, automation controller verifies that the files included during signing have not changed, and that files have been added or removed unexpectedly. If the signature is not valid or a file has changed, the project fails to update, and jobs making use of the project will not launch. Verification status of the project ensures that only secure, untampered content can be run in jobs.
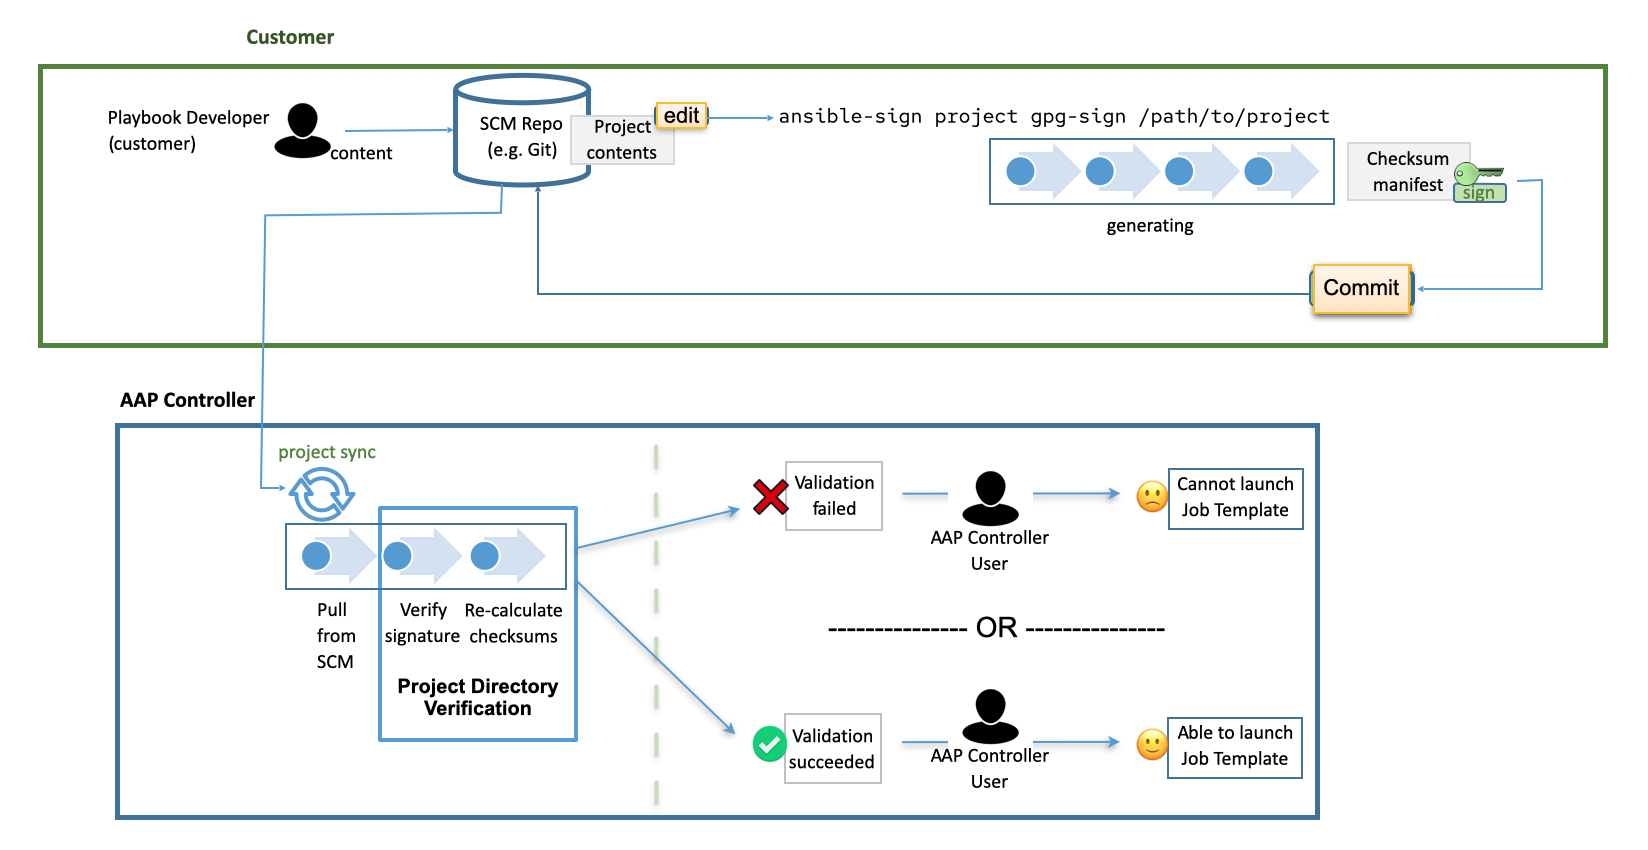
If the repository has already been configured for signing and verification, the usual workflow for altering the project becomes the following:
- You have a project repository set up already and want to make a change to a file.
You make the change, and run the following command:
ansible-sign project gpg-sign /path/to/projectThis command updates a checksum manifest and signs it.
- You commit the change, the updated checksum manifest, and the signature to the repository.
- When you synchronize the project, automation controller pulls in the new changes, checks that the public key associated with the project in automation controller matches the private key that the checksum manifest was signed with (this prevents tampering with the checksum manifest itself), then re-calculates the checksums of each file in the manifest to ensure that the checksum matches (and thus that no file has changed). It also ensures that all files are accounted for:
Files must be included in, or excluded from, the MANIFEST.in file. For more information on this file, see Sign a project If files have been added or removed unexpectedly, verification fails.
17.1. Prerequisites
RHEL nodes must properly be subscribed to:
- RHEL subscription with baseos and appstream repositories must be enabled.
Your Red Hat Ansible Automation Platform subscription and the proper channel must be enabled:
ansible-automation-platform-2.4-for-rhel-8-x86_64-rpms for RHEL 8
ansible-automation-platform-2.4-for-rhel-9-x86_64-rpms for RHEL 9
A valid GPG public or private keypair is required for signing content. For more information, see How to create GPG keypairs.
For more information about GPG keys, see the GnuPG documentation.
Verify that you have a valid GPG keypair in your default GnuPG keyring, with the following command:
gpg --list-secret-keysIf this command produces no output, or one line of output that states,
trustdb was created, then you do not have a secret key in your default keyring. In this case, refer to How to create GPG keypairs to learn how to create a new keypair before proceeding. If it produces any other output, you have a valid secret key and are ready to useansible-sign.
17.2. Adding a GPG key to automation controller
To use the GPG key for content signing and validation in automation controller, add it by running the following command in the CLI:
$ gpg --list-keys
$ gpg --export --armour <key fingerprint> > my_public_key.asc-
From the navigation panel, select
. - Click .
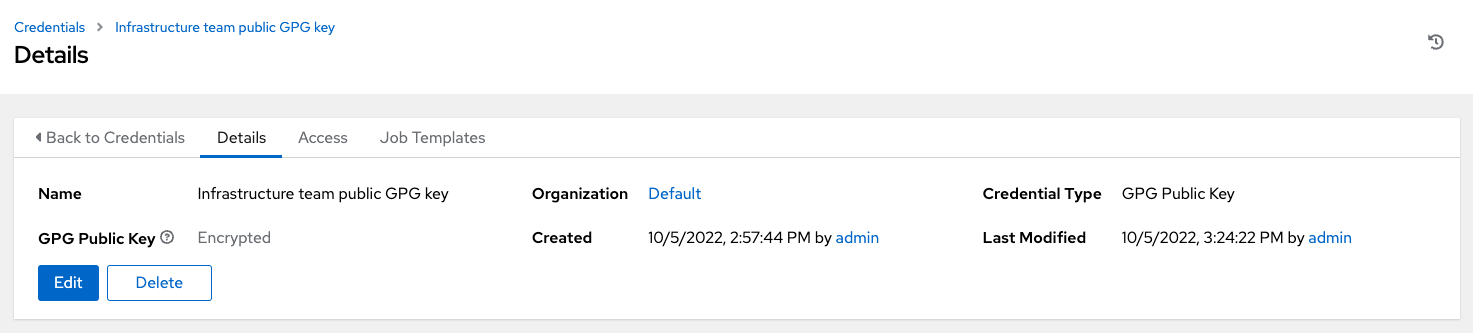
- Provide a meaningful name for the new credential, for example, "Infrastructure team public GPG key".
- In the Credential Type field, select GPG Public Key.
-
Click Browse to locate and select the public key file, for example,
my_public_key.asc. Click .
This credential can now be selected in
projects <ug_projects_add>, and content verification automatically takes place on future project synchronizations.
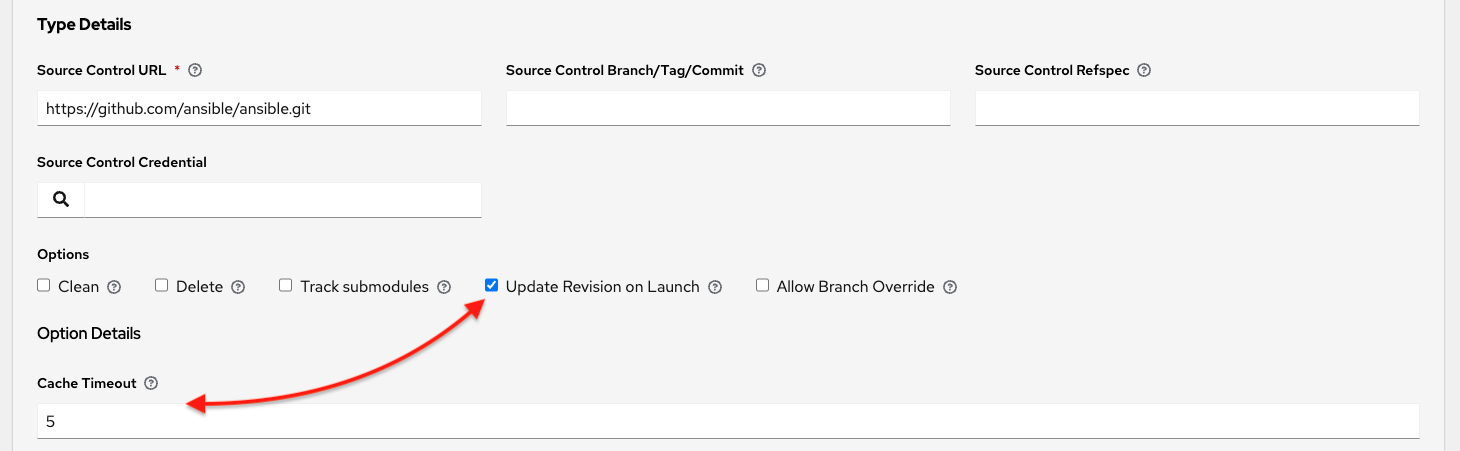
Use the project cache SCM timeout to control how often you want automation controller to re-validate the signed content. When a project is configured to update on launch (of any job template configured to use that project), you can enable the cache timeout setting, which sets it to update after N seconds have passed since the last update. If validation is running too frequently, you can slow down how often project updates occur by specifying the time in the Cache Timeout field of the Option Details pane of the project.
17.3. Installing the ansible-sign CLI utility
Use the ansible-sign utility to provide options for the user to sign and verify whether the project is signed.
Procedure
Run the following command to install
ansible-sign:$ dnf install ansible-signVerify that
ansible-signwas successfully installed using the following command:$ ansible-sign --versionOutput similar to the following indicates that you have successfully installed
ansible-sign:ansible-sign 0.1
17.4. Sign a project
Signing a project involves an Ansible project directory. For more information on project directory structures, see Sample Ansible setup in the Ansible documentation.
The following sample project has a very simple structure: an inventory file, and two small playbooks under a playbooks directory:
$ cd sample-project/
$ tree -a .
.
├── inventory
└── playbooks
    └── get_uptime.yml
    └── hello.yml

    1 directory, 3 files
The commands used assume that your working directory is the root of your project. ansible-sign project commands take the project root directory as their last argument.
Use . to indicate the current working directory.
ansible-sign protects content from tampering by taking checksums (SHA256) of all of the secured files in the project, compiling those into a checksum manifest file, and then signing that manifest file.
To sign content, create a MANIFEST.in file in the project root directory that tells ansible-sign which files to protect.
Internally, ansible-sign uses the distlib.manifest module of Python’s distlib library, therefore MANIFEST.in must follow the syntax that this library specifies. For an explanation of the 'MANIFEST.in` file directives, see the Python Packaging User Guide.
In the sample project, two directives are included, resulting in the following MANIFEST.in file:
include inventory
recursive-include playbooks *.yml
With this file in place, generate your checksum manifest file and sign it. Both of these steps are achieved in a single ansible-sign command:
$ ansible-sign project gpg-sign .Successful execution displays output similar to the following:
[OK   ] GPG signing successful!
[NOTE ] Checksum manifest: ./.ansible-sign/sha256sum.txt
[NOTE ] GPG summary: signature created
The project has now been signed.
Note that the gpg-sign subcommand resides under the project subcommand.
For signing project content, every command starts with ansible-sign project.
Every ansible-sign project command takes the project root directory . as its final argument.
ansible-sign makes use of your default keyring and looks for the first available secret key that it can find, to sign your project. You can specify a specific secret key to use with the --fingerprint option, or even a completely independent GPG home directory with the --gnupg-home option.
If you are using a desktop environment, GnuPG automatically prompts you for your secret key’s passphrase.
If this functionality does not work, or you are working without a desktop environment, for example, through SSH, you can use the -p --prompt-passphrase flag after gpg-sign , which causes ansible-sign to prompt for the password instead.
Note that an .ansible-sign directory was created in the project directory. This directory contains the checksum manifest and a detached GPG signature for it.
$ tree -a .
.
├── .ansible-sign
│   ├── sha256sum.txt
│   └── sha256sum.txt.sig
├── inventory
├── MANIFEST.in
└── playbooks
    ├── get_uptime.yml
    └── hello.yml
17.5. Verify your project
To verify that a signed Ansible project has not been altered, you can use ansible-sign to check whether the signature is valid and that the checksums of the files match what the checksum manifest says they should be. The ansible-sign project gpg-verify command can be used to automatically verify both of these conditions.
$ ansible-sign project gpg-verify .
[OK   ] GPG signature verification succeeded.
[OK   ] Checksum validation succeeded.
By default, ansible-sign makes use of your default GPG keyring to look for a matching public key. You can specify a keyring file with the --keyring option, or a different GPG home with the --gnugpg-home option.
If verification fails for any reason, information is displayed to help you debug the cause. More verbosity can be enabled by passing the global --debug flag, immediately after ansible-sign in your commands.
When a GPG credential is used in a project, content verification automatically takes place on future project synchronizations.
17.6. Automate signing
In environments with highly-trusted Continuous Integration (CI) environments such as OpenShift or Jenkins, it is possible to automate the signing process.
For example, you can store your GPG private key in a CI platform of choice as a secret, and import that into GnuPG in the CI environment. You can then run through the signing workflow within the normal CI environment.
When signing a project using GPG, the environment variable ANSIBLE_SIGN_GPG_PASSPHRASE can be set to the passphrase of the signing key. This can be injected and masked or secured in a CI pipeline.
Depending on the scenario, ansible-sign returns with a different exit-code, during both signing and verification. This can also be useful in the context of CI and automation, as a CI environment can act differently based on the failure. For example, it can send alerts for some errors, but fail silently for others.
These are the current exit codes used in ansible-sign, which can be considered stable:
| Exit code | Approximate meaning | Example scenarios |
|---|---|---|
| 0 | Success |
|
| 1 | General failure |
|
| 2 | Checksum verification failure |
|
| 3 | Signature verification failure |
|
| 4 | Signing process failure |
|