Chapter 29. Schedules
From the navigation panel, click
Each schedule has a corresponding Actions column that has options to enable or disable that schedule using the On or Off toggle next to the schedule name. Click the Edit
![]() icon to edit a schedule.
icon to edit a schedule.
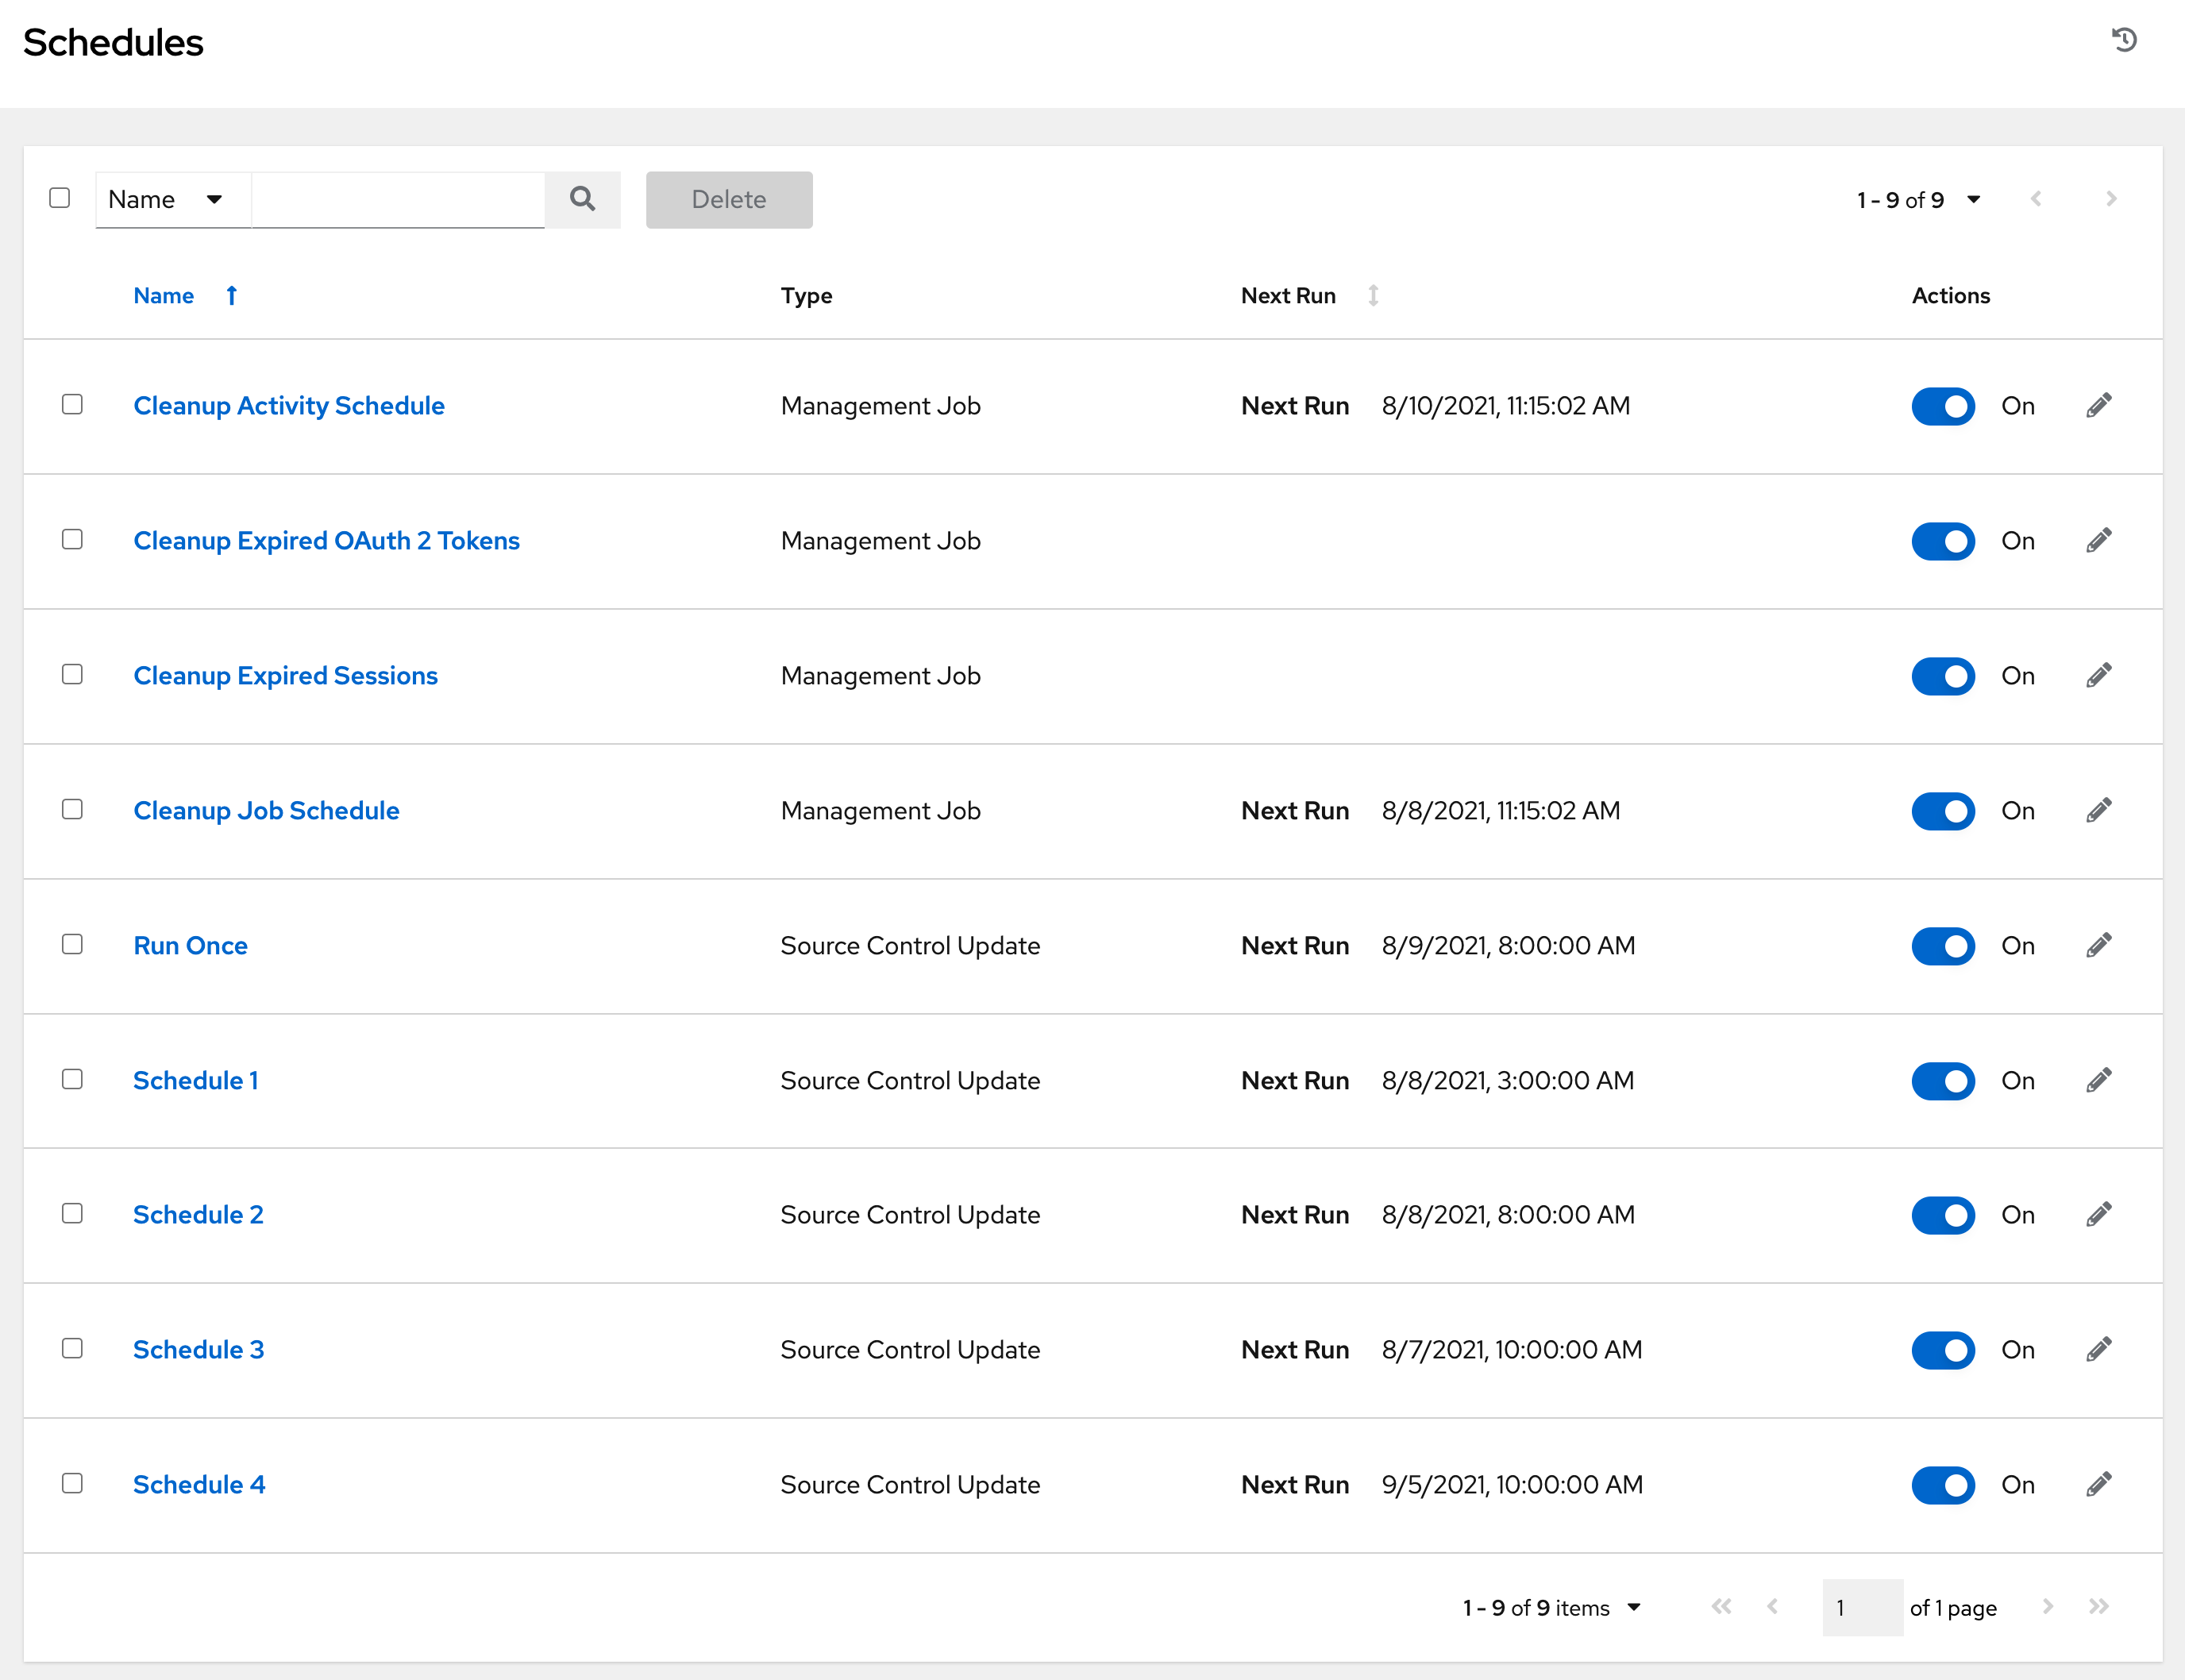
If you are setting up a template, a project, or an inventory source, click the Schedules tab to configure schedules for these resources. When you create a schedule, they are listed by the following:
- Name
- Click the schedule name to open its details.
- Type
- This identifies whether the schedule is associated with a source control update or a system-managed job schedule.
- Next run
- The next scheduled run of this task.
29.1. Adding a new schedule
You can only create schedules from a template, project, or inventory source, and not directly on the main Schedules screen.
To create a new schedule:
Procedure
- Click the Schedules tab of the resource that you are configuring. This can be a template, project, or inventory source.
Click . This opens the Create New Schedule window.
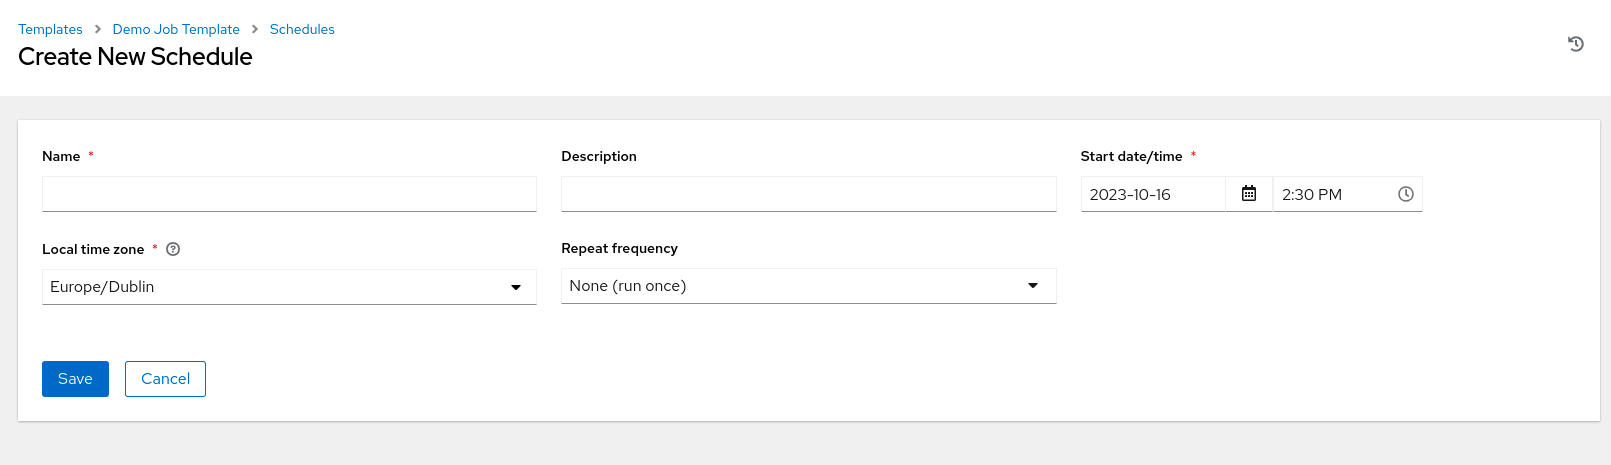
Enter the appropriate details into the following fields:
- Name: Enter the name.
- Optional: Description: Enter a description.
- Start date/time: Enter the date and time to start the schedule.
- Local time zone: The start time that you enter must be in this time zone.
Repeat frequency: Appropriate scheduling options display depending on the frequency you select.
The Schedule Details display when you establish a schedule, enabling you to review the schedule settings and a list of the scheduled occurrences in the selected Local Time Zone.
ImportantJobs are scheduled in UTC. Repeating jobs that run at a specific time of day can move relative to a local time zone when Daylight Savings Time shifts occur. The system resolves the local time zone based time to UTC when the schedule is saved. To ensure your schedules are correctly created, set your schedules in UTC time.
- Click .
Use the On or Off toggle to stop an active schedule or activate a stopped schedule.