Chapter 26. Working with Webhooks
A Webhook enables you to execute specified commands between applications over the web. Automation controller currently provides webhook integration with GitHub and GitLab.
Set up a webhook using the following services:
The webhook post-status-back functionality for GitHub and GitLab is designed to work only under certain CI events. Receiving another kind of event results in messages such as the following in the service log:
awx.main.models.mixins Webhook event did not have a status API endpoint associated, skipping.
26.1. Setting up a GitHub webhook
Automation controller has the ability to run jobs based on a triggered webhook event coming in. Job status information (pending, error, success) can be sent back only for pull request events. If you do not need automation controller to post job statuses back to the webhook service, go directly to step 3.
Procedure
Generate a Personal Access Token (PAT) for use with automation controller:
- In the profile settings of your GitHub account, select Settings.
- From the navigation panel, select .
- On the Developer Settings page, select Personal access tokens.
- From the Personal access tokens screen, click .
- When prompted, enter your GitHub account password to continue.
- In the Note field, enter a brief description about what this PAT is used for.
- In the Select scopes fields, check the boxes next to repo:status, repo_deployment, and public_repo. The automation webhook only needs repository scope access, with the exception of invites. For more information, see Scopes for OAuth apps documentation.
Click .
ImportantWhen the token is generated, ensure that you copy the PAT, as you need it in step 2. You cannot access this token again in GitHub.
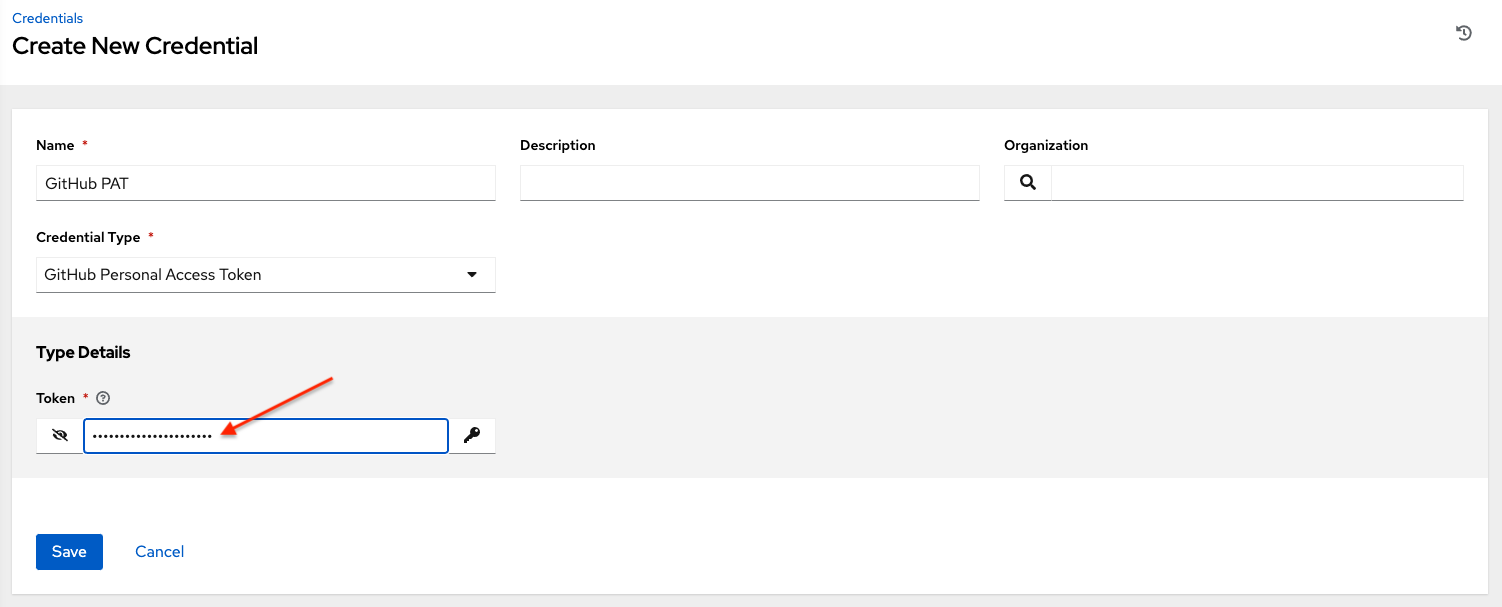
Use the PAT to optionally create a GitHub credential:
- Go to your instance, and Create a new credential for the GitHub PAT using the generated token.
Make note of the name of this credential, as you use it in the job template that posts back to GitHub.
Go to the job template with which you want to enable webhooks, and select the webhook service and credential you created in the preceding step.
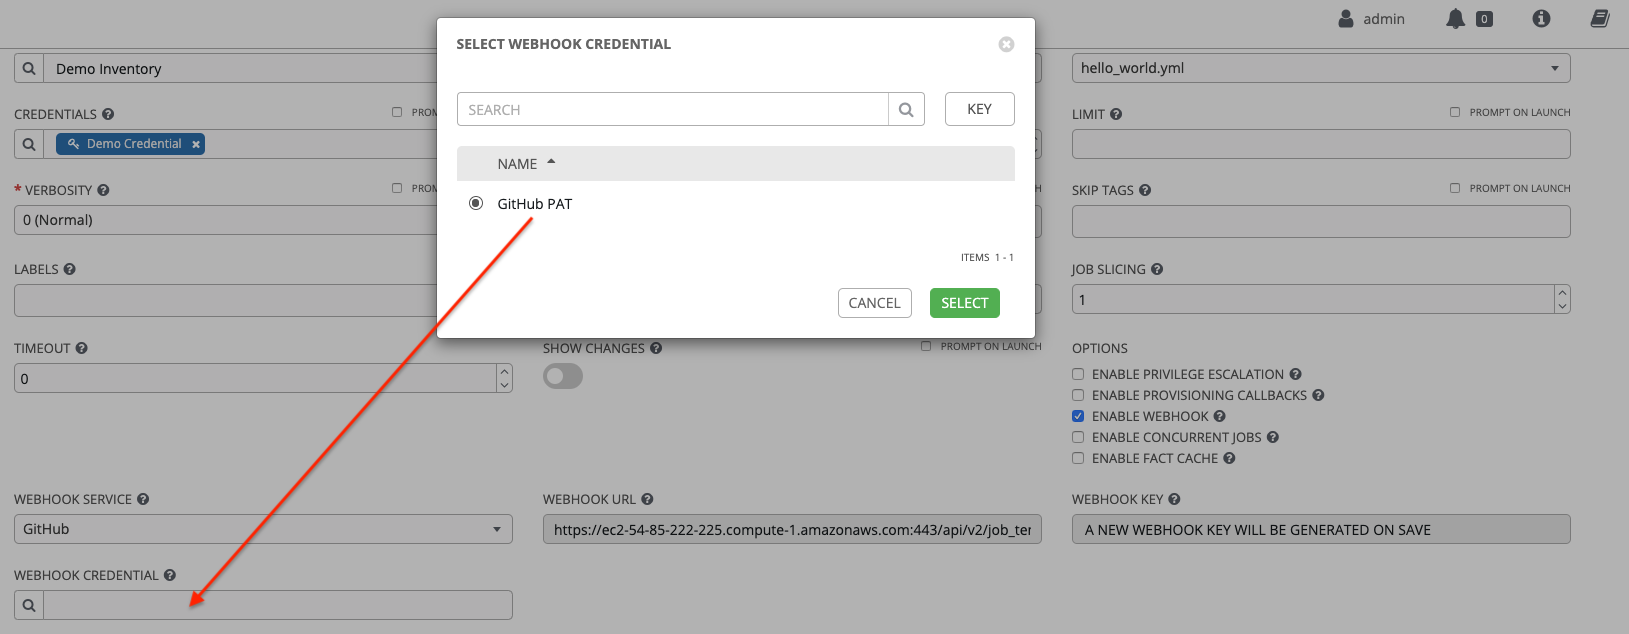
- Click . Your job template is set up to post back to GitHub.
- Go to a GitHub repository where you want to configure webhooks and select .
-
From the navigation panel, select
. - To complete the Add webhook page, you must check the Enable Webhook option in a job template or workflow job template. For more information, see step 3 in both Creating a job template and Creating a workflow template.
Complete the following fields:
- Payload URL: Copy the contents of the Webhook URL from the job template and paste it here. The results are sent to this address from GitHub.
- Content type: Set it to application/json.
- Secret: Copy the contents of the Webhook Key from the job template and paste it here.
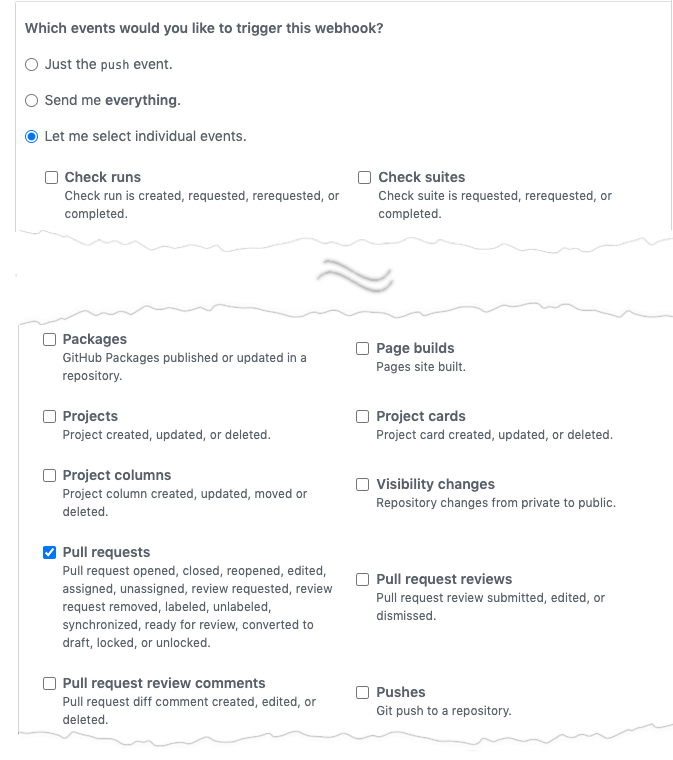
Which events would you like to trigger this webhook?: Select the types of events you want to trigger a webhook. Any such event will trigger the job or workflow. To have the job status (pending, error, success) sent back to GitHub, you must select Pull requests in the Let me select individual events section.
- Active: Leave this checked.
- Click .
- When your webhook is configured, it is displayed in the list of webhooks active for your repository, along with the ability to edit or delete it. Click on a webhook, to go to the Manage webhook screen.
- Scroll to view the delivery attempts made to your webhook and whether they succeeded or failed.
Additional resources
For more information, see the Webhooks documentation.
26.2. Setting up a GitLab webhook
Automation controller has the ability to run jobs based on a triggered webhook event coming in. Job status information (pending, error, success) can be sent back only for pull request events. If automation controller is not required to post job statuses back to the webhook service, go directly to step 3.
Procedure
Generate a Personal Access Token (PAT) for use with automation controller:
- From the navigation panel in GitLab, select your avatar and .
- From the navigation panel, select .
Complete the following fields:
- Token name: Enter a brief description about what this PAT is used for.
- Expiration date: Skip this field unless you want to set an expiration date for your webhook.
- Select scopes: Select those that are applicable to your integration. For automation controller, api is the only selection necessary.
Click .
ImportantWhen the token is generated, ensure that you copy the PAT, as you need it in step 2. You cannot access this token again in GitLab.
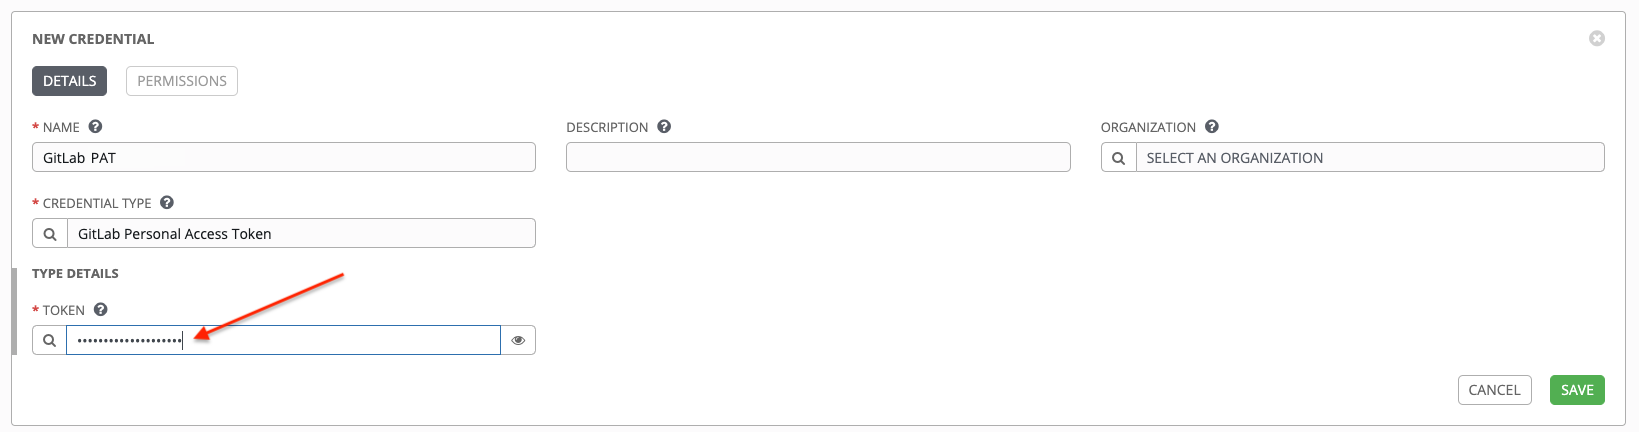
Use the PAT to optionally create a GitLab credential:
- Go to your instance, and create a new credential for the GitLab PAT using the generated token.
Make note of the name of this credential, as you use it in the job template that posts back to GitLab.
Go to the job template with which you want to enable webhooks, and select the webhook service and credential you created in the preceding step.
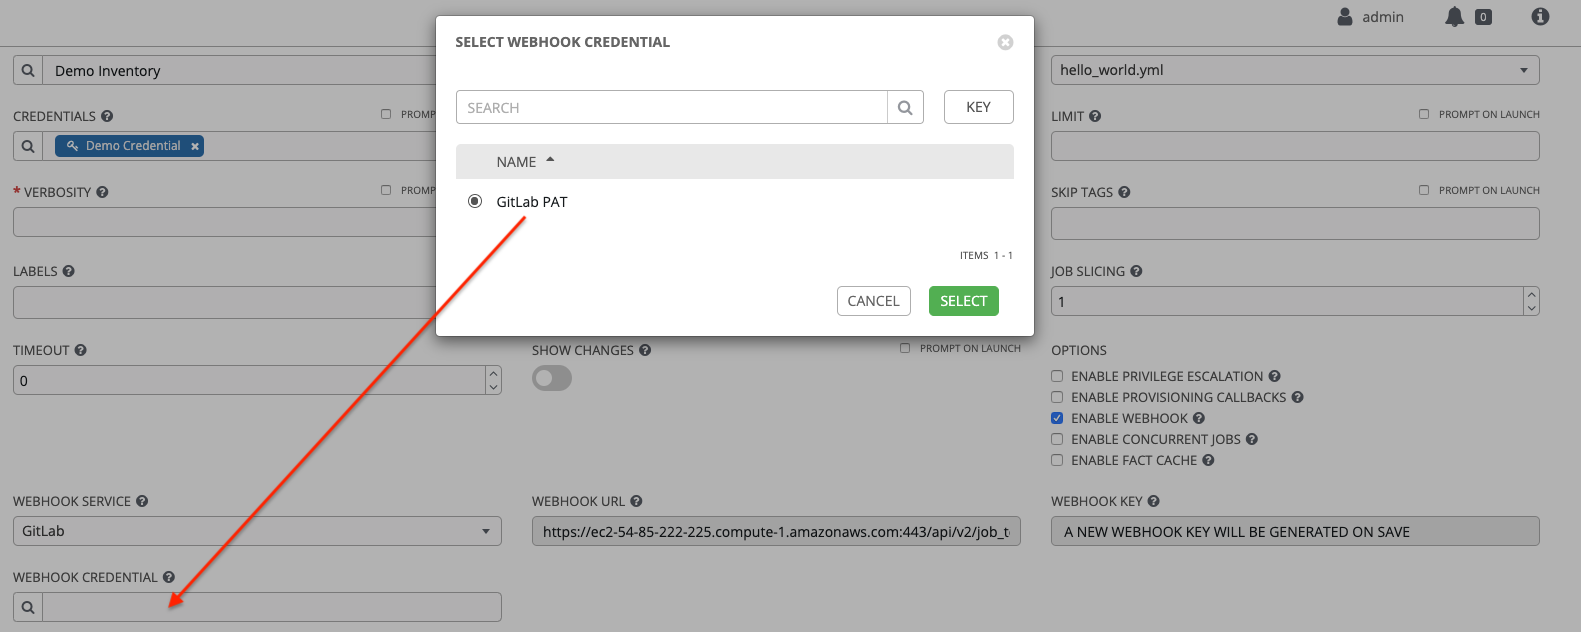
- Click . Your job template is set up to post back to GitLab.
- Go to a GitLab repository where you want to configure webhooks.
-
From the navigation panel, select
. - To complete the Add webhook page, you must check the Enable Webhook option in a job template or workflow job template. For more information, see step 3 in both Creating a job template and Creating a workflow template.
Complete the following fields:
- URL: Copy the contents of the Webhook URL from the job template and paste it here. The results are sent to this address from GitLab.
- Secret Token: Copy the contents of the Webhook Key from the job template and paste it here.
- Trigger: Select the types of events you want to trigger a webhook. Any such event will trigger the job or workflow. To have job status (pending, error, success) sent back to GitLab, you must select Merge request events in the Trigger section.
- SSL verification: Leave Enable SSL verification selected.
- Click .
- When your webhook is configured, it is displayed in the list Project Webhooks for your repository, along with the ability to test events, edit or delete the webhook. Testing a webhook event displays the results on each page whether it succeeded or failed.
Additional resources
For more information, see Webhooks.
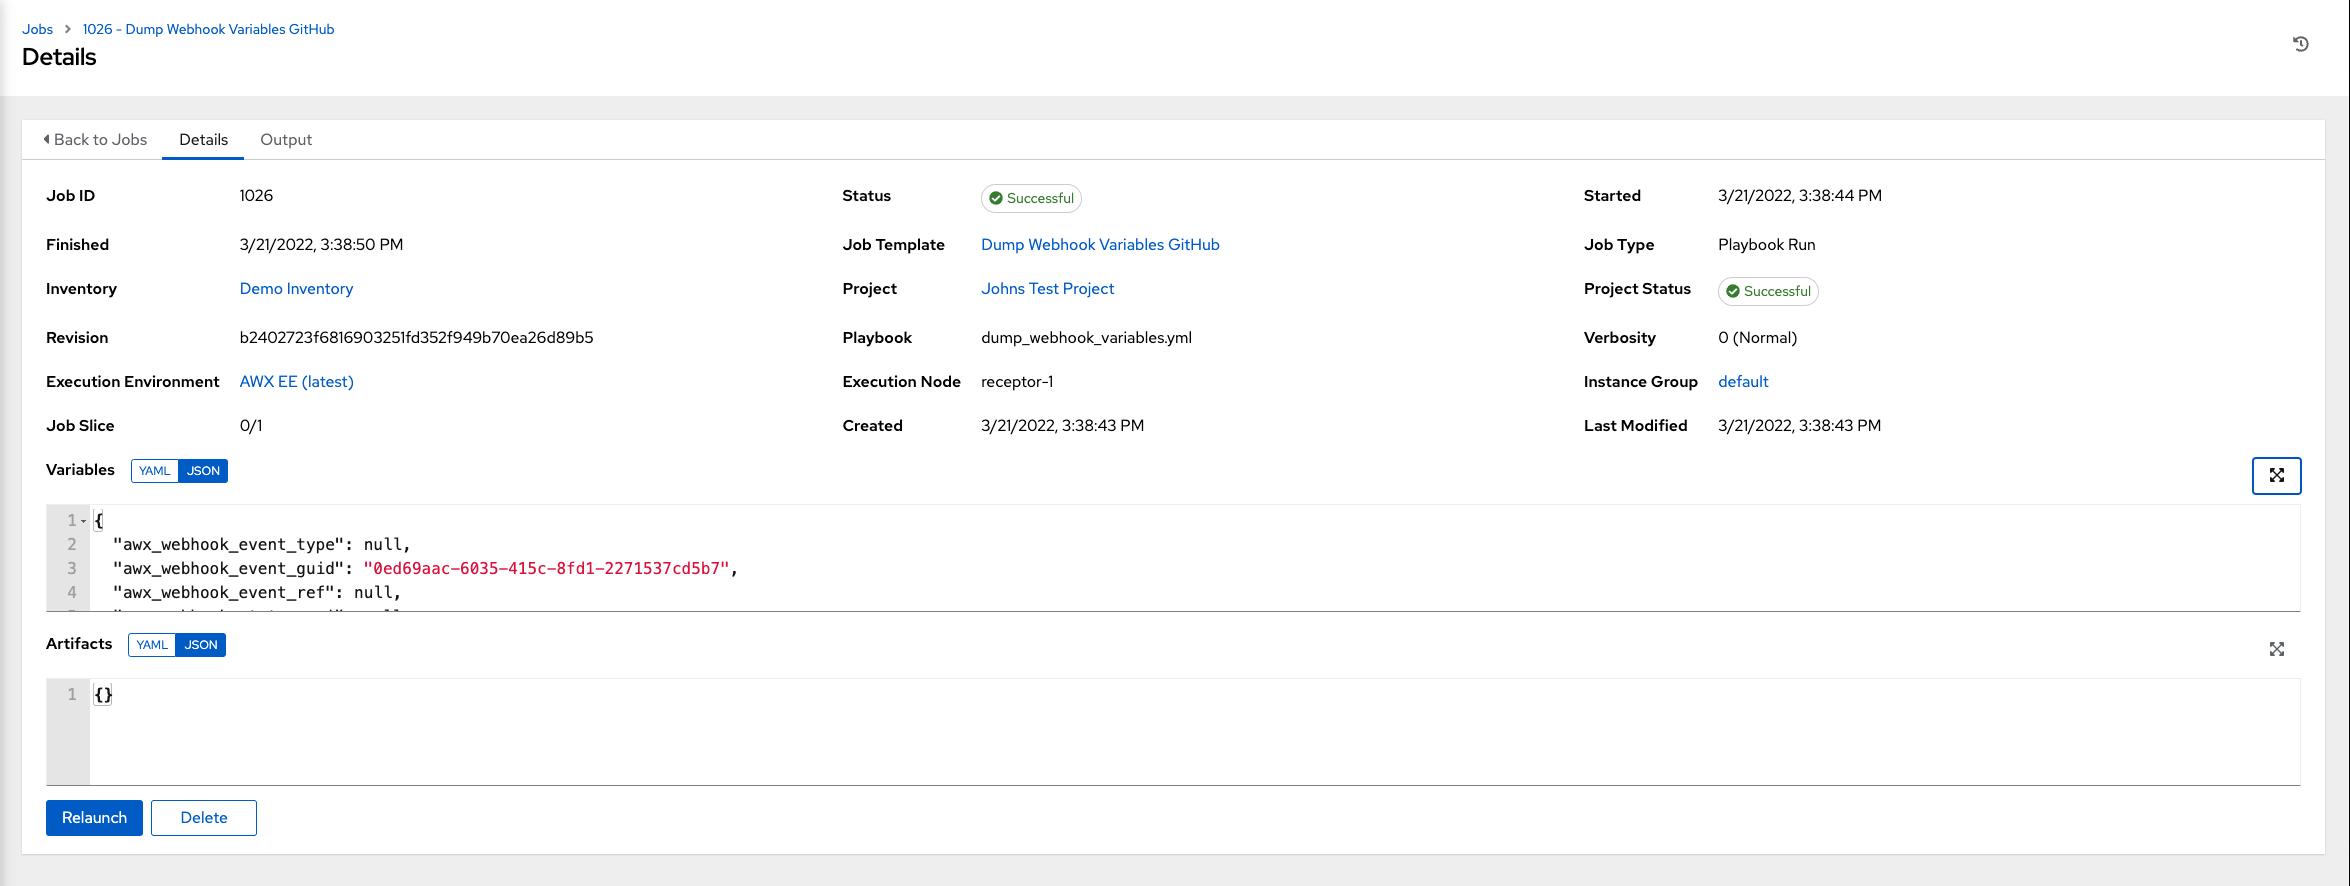
26.3. Viewing the payload output
You can view the entire payload exposed as an extra variable.
Procedure
-
From the navigation panel, select
. - Select the job template with the webhook enabled.
- Select the Details tab.
-
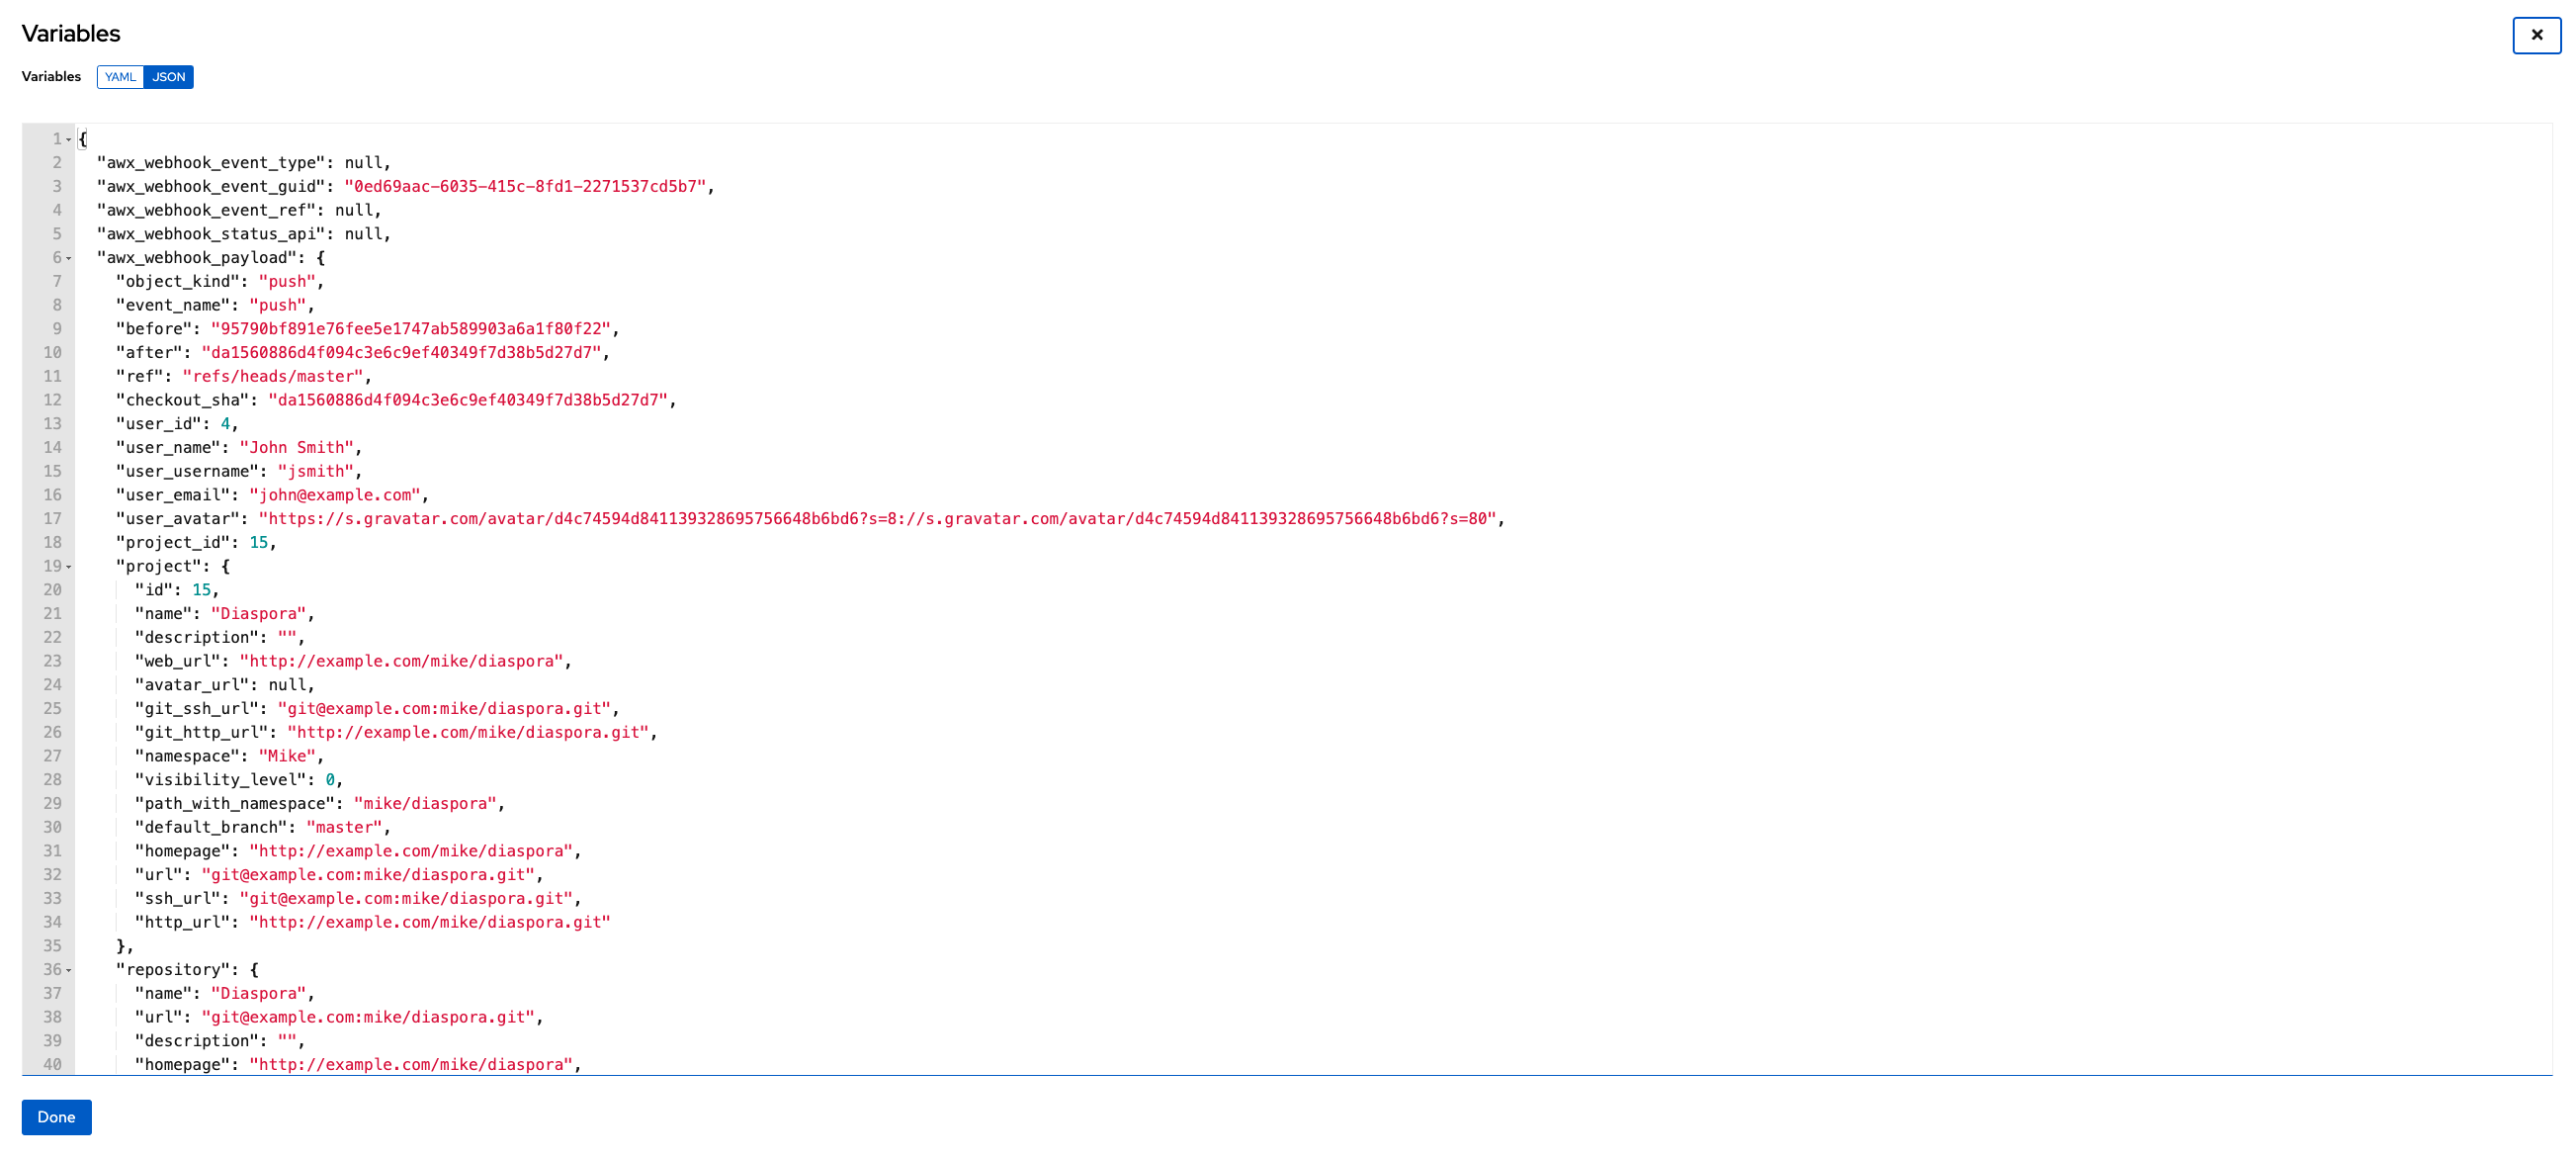
In the Extra Variables field, view the payload output from the
awx_webhook_payloadvariable, as shown in the following example: