11.5.2. Adding Unallocated Volumes to a volume group
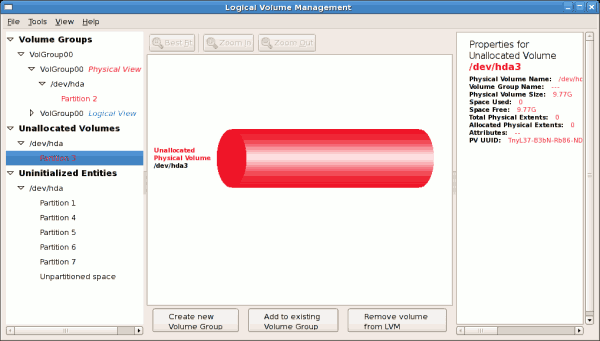
Once initialized, a volume will be listed in the 'Unallocated Volumes' list. The figure below illustrates an unallocated partition (Partition 3). The respective buttons at the bottom of the window allow you to:
To add the volume to an existing volume group, click on the button.
- create a new volume group,
- add the unallocated volume to an existing volume group,
- remove the volume from LVM.
Figure 11.18. Unallocated Volumes
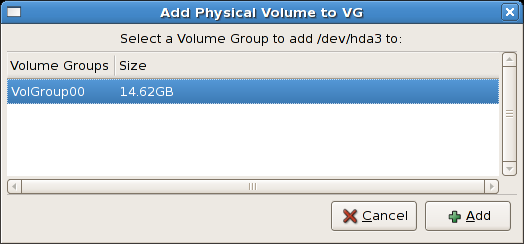
Clicking on the button will display a pop up window listing the existing volume groups to which you can add the physical volume you are about to initialize. A volume group may span across one or more hard disks. In this example only one volume group exists as illustrated below.
Figure 11.19. Add physical volume to volume group
Once added to an existing volume group the new logical volume is automatically added to the unused space of the selected volume group. You can use the unused space to:
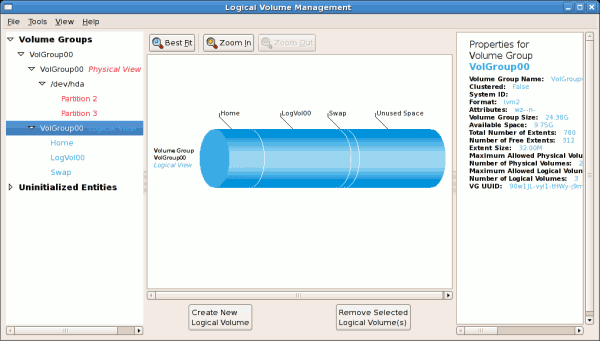
The figure below illustrates the logical view of 'VolGroup00' after adding the new volume group.
- create a new logical volume (click on the button,
- select one of the existing logical volumes and increase the extents (see Section 11.5.6, “Extending a volume group”),
- select an existing logical volume and remove it from the volume group by clicking on the button. Please note that you cannot select unused space to perform this operation.
Figure 11.20. Logical view of volume group
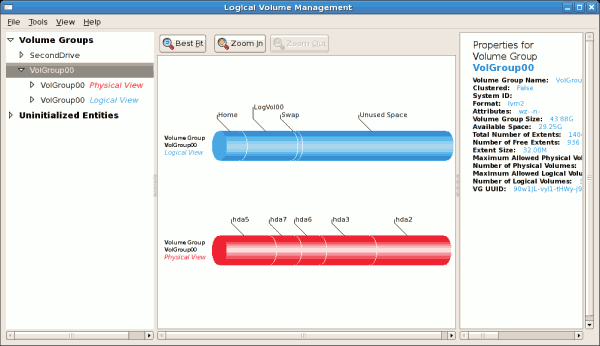
In the figure below, the uninitialized entities (partitions 3, 5, 6 and 7) were added to 'VolGroup00'.
Figure 11.21. Logical view of volume group


