15.3.3. Performing a Network Installation
When you start an installation with the
askmethod or repo= options, you can install Red Hat Enterprise Linux from a network server using FTP, HTTP, HTTPS, or NFS protocols. Anaconda uses the same network connection to consult additional software repositories later in the installation process.
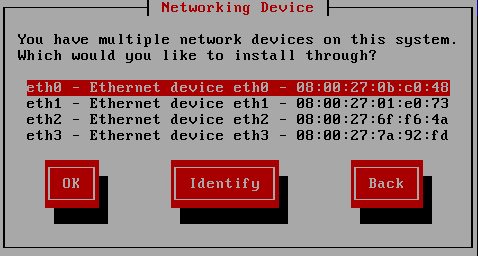
If your system has more than one network device, anaconda presents you with a list of all available devices and prompts you to select one to use during installation. If your system only has a single network device, anaconda automatically selects it and does not present this dialog.
Figure 15.6. Networking Device
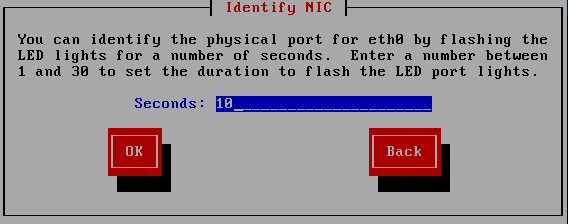
If you are not sure which device in the list corresponds to which physical socket on the system, select a device in the list then press the button. The Identify NIC dialog appears.
Figure 15.7. Identify NIC
The sockets of most network devices feature an activity light (also called a link light) — an LED that flashes to indicate that data is flowing through the socket. Anaconda can flash the activity light of the network device that you selected in the Networking Device dialog for up to 30 seconds. Enter the number of seconds that you require, then press . When anaconda finishes flashing the light, it returns you to the Networking Device dialog.
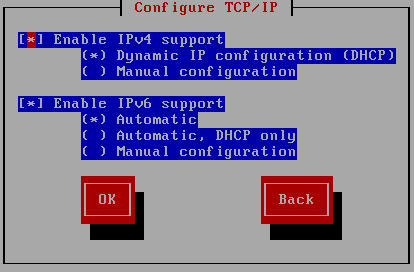
When you select a network device, anaconda prompts you to choose how to configure TCP/IP:
IPv4 options
- Dynamic IP configuration (DHCP)
- Anaconda uses DHCP running on the network to supply the network configuration automatically.
- Manual configuration
- Anaconda prompts you to enter the network configuration manually, including the IP address for this system, the netmask, the gateway address, and the DNS address.
IPv6 options
- Automatic
- Anaconda uses router advertisement (RA) and DHCP for automatic configuration, based on the network environment. (Equivalent to the
Automaticoption in NetworkManager) - Automatic, DHCP only
- Anaconda does not use RA, but requests information from DHCPv6 directly to create a stateful configuration. (Equivalent to the
Automatic, DHCP onlyoption in NetworkManager) - Manual configuration
- Anaconda prompts you to enter the network configuration manually, including the IP address for this system, the netmask, the gateway address, and the DNS address.
Anaconda supports the IPv4 and IPv6 protocols. However, if you configure an interface to use both IPv4 and IPv6, the IPv4 connection must succeed or the interface will not work, even if the IPv6 connection succeeds.
Figure 15.8. Configure TCP/IP
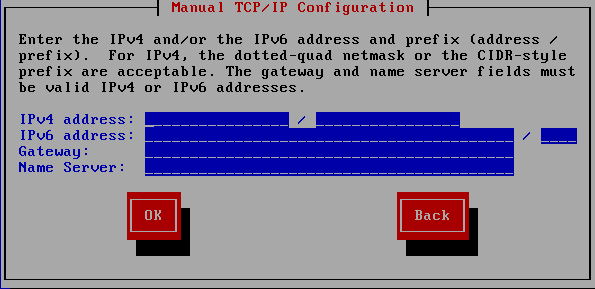
By default, anaconda uses DHCP to provide network settings automatically for IPv4 and automatic configuration to provide network settings for IPv6. If you choose to configure TCP/IP manually, anaconda prompts you to provide the details in the Manual TCP/IP Configuration dialog:
Figure 15.9. Manual TCP/IP Configuration
The dialog provides fields for IPv4 and IPv6 addresses and prefixes, depending on the protocols that you chose to configure manually, together with fields for the network gateway and name server. Enter the details for your network, then press .
When the installation process completes, it will transfer these settings to your system.
- If you are installing via NFS, proceed to Section 15.3.4, “Installing via NFS”.
- If you are installing via Web or FTP, proceed to Section 15.3.5, “Installing via FTP, HTTP, or HTTPS”.


