31.5. Deploying Web Applications
Important
31.5.1. Runtime Information and Deployment Resources
31.5.1.1. Views of Deployments
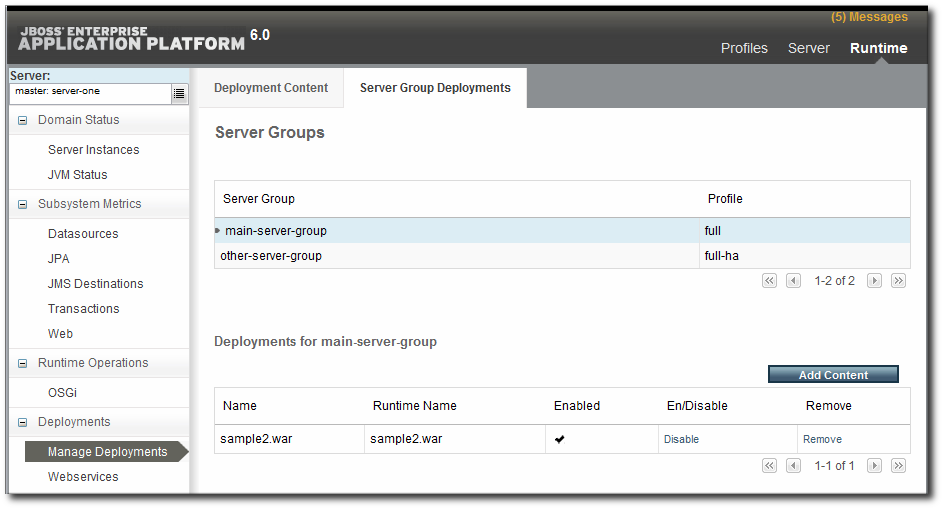
Figure 31.11. Deployments in the Runtime Page
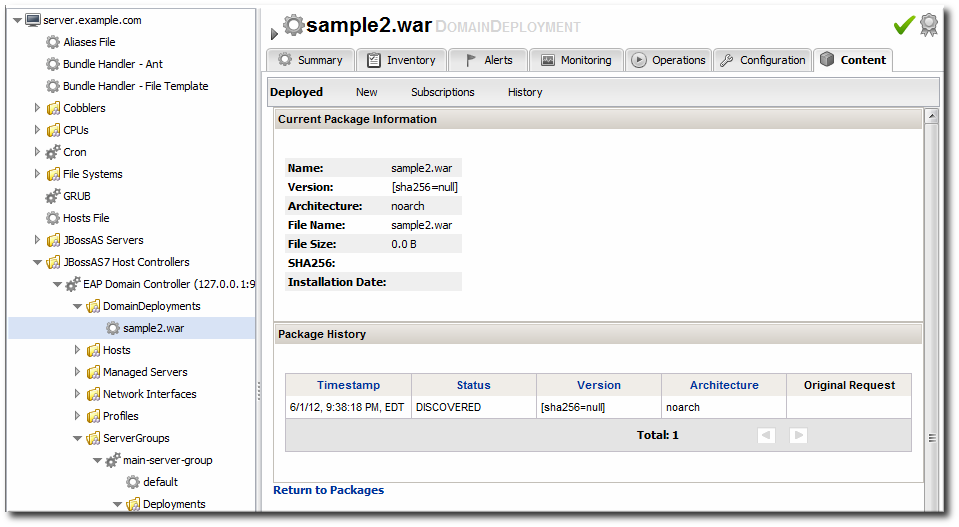
- A web application is treated as a separate entity, in and of itself. It has its own place in the inventory; its association with domains and server groups is reflected as it is a child of those resources.JBoss ON also records package details, like its file size and an identifying SHA256 hash.
- A web application has a history. Updates to packages are recorded in a changelog which makes it possible to track how the application has been maintained.
- Web applications can be monitored. Response time metrics specifically track the performance of web applications, apart from the performance or monitoring of the underlying server.
Figure 31.12. Deployment Resource Details in JBoss ON
- Creating content repositories to store patches and updates
- Tracking multiple versions of content
- Reverting software packages to a previous version (particularly for standalone servers)
- Using the same content repository for multiple EAP instances, including multiple domains and standalone server
- Tracking (and auditing) changes to content
31.5.1.2. Deployment Paths for Standalone Servers and Domains
- Create a deployment as a child resource
- Use a bundle to provision the application in the deployment directory
31.5.2. Deploying Web Applications to a Domain
Note
- Click the Inventory tab in the top menu.
- Select Servers - Top Level Imports in the Resources menu table on the left. Select the JBoss EAP 6 domain controller.
- Right-click the domain controller entry.
- In the Create New menu, select the item for .
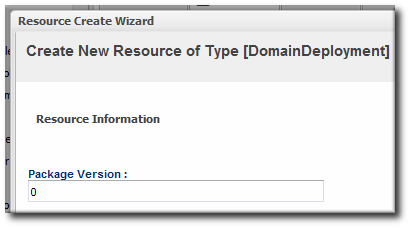
- Enter the version number.
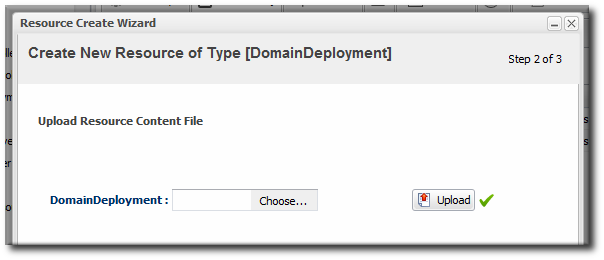
- Upload the EAR, WAR, or JAR file.
- Optionally, enter a runtime name for the deployment.
- At the bottom of the wizard, set an optional timeout period. This is how long the JBoss ON server will wait during the deployment process before determining that the deployment has failed.
Note
The timeout period only applies to the server's reporting a result. If the operation continues running, it can still complete successfully, and the web application is deployed.Particularly for large application files, do not set a low timeout period, or the server will mark the deployment as having failed. If the deployment completes later, the web application must be imported into the inventory manually; it will not be discovered by the agent. - Click .
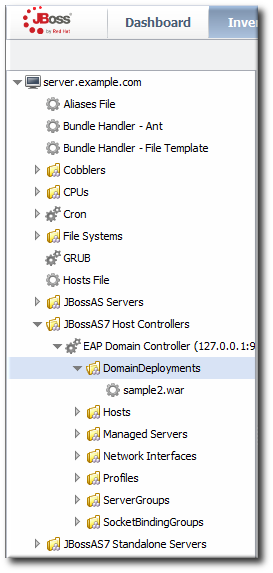
Figure 31.13. Domain Deployments Directory
31.5.3. Assigning Web Applications to a Server Group
Note
Important
Note
- Click the Inventory tab in the top menu.
- Select Servers - Top Level Imports in the Resources menu table on the left. Select the JBoss EAP 6 domain controller.
- Expand the DomainDeployments folder.To deploy all web applications in the deployments folder, select the deployments folder itself to run the operation.To deploy a single web application, select the specific web application.
- Open the Operations tab for the server.
- Click the New button at the bottom of the page.
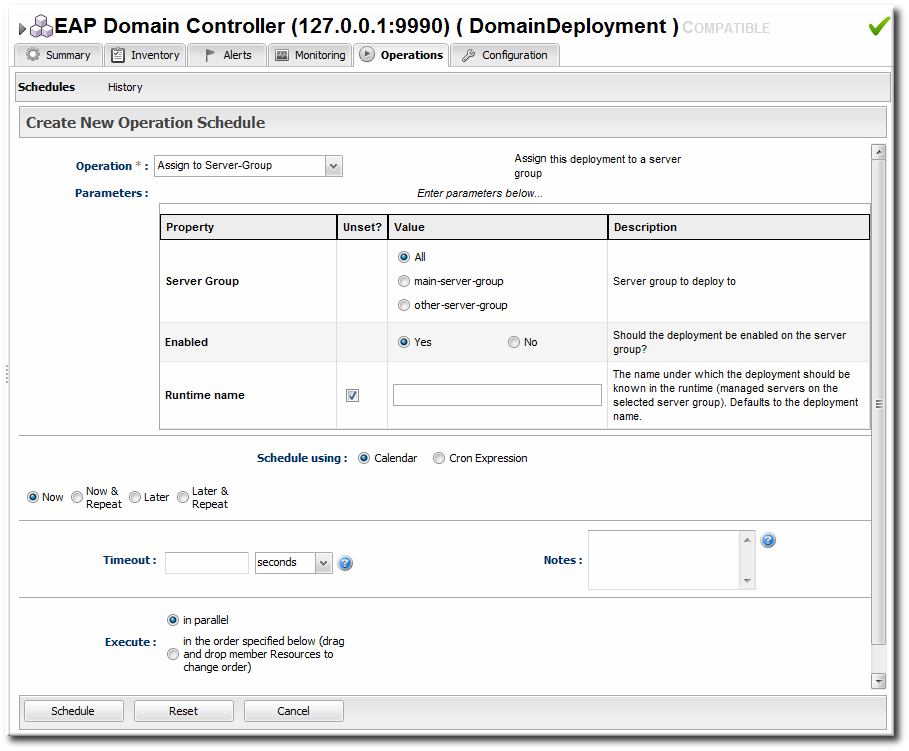
- Select the Assign to Server-Group option from the drop-down menu.
- Select which group (or all groups) to deploy the application to.
- Enter the standard information for operations, like the schedule for when to run the operation and the timeout period.
Note
The timeout period sets how long the server waits before assuming that the operation has timed out and failed. This does not necessarily mean that the operation has failed or stopped running; it could complete successfully past the time out period. - If there are multiple web applications being deployed, then set the Execute radio button to the way set the order that the packages are deployed. All packages can be deployed at once, or they can be deployed in a specific order.
- Click the Schedule button.
- Optionally, run a discovery scan on the agent to discover the new content resource. By default, discovery scans for services are only made every 24 hours, so there could be a long delay in discovering new content.
- Open the agent entry in the UI.
- Open the Operations tab, and select the execute prompt command operation.
- Enter the
discoverycommand as an operation rgument. This runs a discovery scan. - Click the Schedule button.
31.5.4. Extended Example: Assigning Web Applications and Managing Updates
Tim the IT Guy wants to have a clear progression for web applications, from development through staging and production. The native structure in EAP 6 allows him to create different server groups and deploy content from his central domain controller to the appropriate server groups as it passes testing at each stage.
- Tim first outlines what server groups he needs to maintain. For a simple environment, he just wants three groups: testing, staging, and production.
- He creates two content repositories, one for patches and one for new versions of the web application.
- He creates the domain deployment and then promotes the web application to the testing server group.
- Tim configures response time monitoring for the web application. Once it meets the required performance parameters in the testing area, Tim promotes the deployment to the staging and then production server groups.
The package history for each deployment allows Tim to track when the web application was deployed, its version, and its content.
31.5.5. Enabling and Disabling Web Applications
- Click the Inventory tab in the top menu.
- Select Servers - Top Level Imports in the Resources menu table on the left. Select the JBoss EAP 6 domain controller.
- In the inventory tree, expand the ServerGroups folder, and select the server group from the list.
- Expand the Deployments folder, and select the web application to enable or disable.
- Open the Operations tab for the web app.
- Click the New button at the bottom of the page.
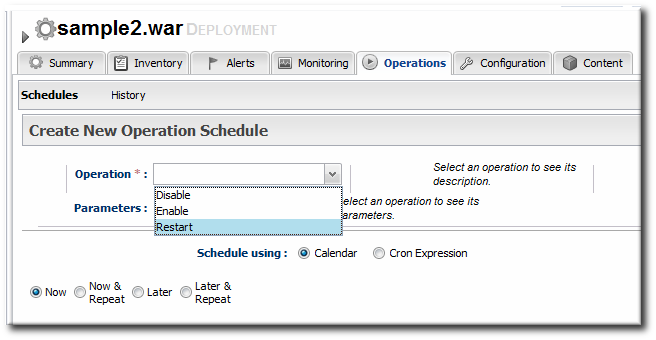
- Select the Enable (or Disable) option from the drop-down menu.
- Click the Schedule button.
31.5.6. Updating Deployment Content
- Click the Inventory tab in the top menu.
- Select Servers - Top Level Imports in the Resources menu table on the left. Select the JBoss EAP 6 server.
- Open the Deployments folder (for the domain, standalone server, or server group), and select the web application to update.
- On the web application details page, open the Content tab, and click the New subtab.
- Click the button.
- Click the button.
- In the pop-up window, click the Add button, and browse the local filesystem to the updated content file to be uploaded.
- Click the UPLOAD button.
- Select the repository where the web application package should be stored. While this is not required, it is beneficial to store the updated package in JBoss ON so that it is available to other JBoss EAP 6 deployments.
- Fill in the version information.
- Confirm the details for the new package, then click .
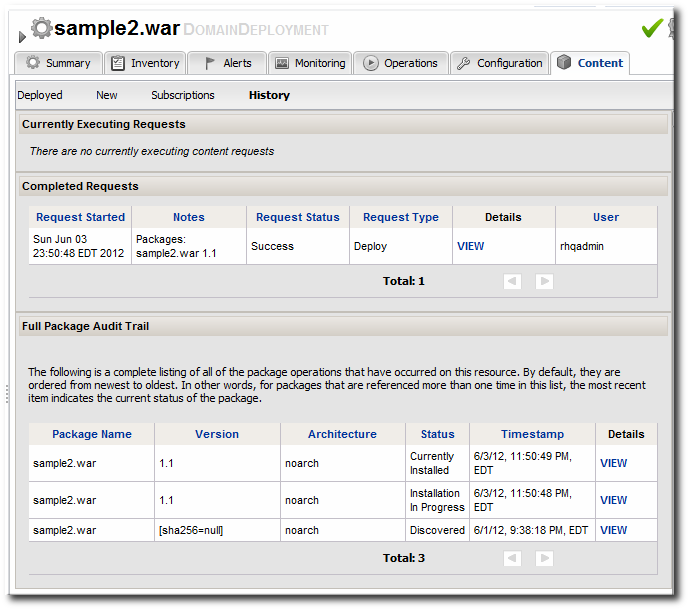
Figure 31.14. Deployment History for a Resource
31.5.7. Deploying Web Applications to a Standalone Server
31.5.7.1. Deploying a Web Application as a Child Resource
Important
discovery command. This runs a discovery scan.
- Click the Inventory tab in the top menu.
- Select Servers - Top Level Imports in the Resources menu table on the left. Select the JBoss EAP 6 standalone server.
- Right-click the standalone server entry in the navigation tree.
- In the Create New menu, select the item for .
- Enter the version number.
- Upload the EAR, WAR, or JAR file.
- Optionally, enter a runtime name for the deployment.
- At the bottom of the wizard, set an optional timeout period. This is how long the JBoss ON server will wait during the deployment process before determining that the deployment has failed.
Note
The timeout period only applies to the server's reporting a result. If the operation continues running, it can still complete successfully, and the web application is deployed.Particularly for large application files, do not set a low timeout period, or the server will mark the deployment as having failed. If the deployment completes later, the web application must be imported into the inventory manually; it will not be discovered by the agent. - Click .
31.5.7.2. Deploying Web Applications Through Bundles
- In the top menu, click the Bundles tab.
- Upload the distribution file, and go through the deployment wizard to create the bundle version.
- Scroll to the bottom of the window and click the button.
- Select the bundles to deploy.
- Define the destination information for the JBoss standalone server. A destination is a combination of a compatible group (containing the JBoss resource) and the directory to which to deploy the bundle.
- Complete the deployment wizard, setting any require properties.
31.5.8. Tracking Content History and Reverting Changes
Figure 31.15. Deployment History for a Resource
- If the domain deployment or server group deployment is associated with a content repository, then upload an updated package to the content repository and sync the change over to the associated resources.
- Upload an updated package to the domain deployment and use the deploy to group operation to send the updated package to the server groups.
31.5.9. Troubleshooting Deployments
- Q: My deployment says it failed, but when I tried to redeploy the package, it fails because it says the resource already exists.
- Q: I tried to deploy a package to a server group and it seemed to be successful, but I don't see the deployment listed.
- The agent discovery scan hasn't run. There can be several hours between discovery runs, so it can take awhile for the application to appear in the discovery queue. To work around this, run a discovery scan on the agent.
- The package has already been deployed to the domain. Creating a deployment child on a server group actually attempts to create the deployment on the domain (where the content is stored) and then deploys it to the server group. If the package already exists in the domain, then attempting to re-create the deployment on the server group fails as a duplicate.In this case, use the deploy to server group operation on the domain controller to deploy the application.
