5.4. Starting Pipelines
After you create a Pipeline, you need to start it to execute the included Tasks in the defined sequence. You can start a Pipeline Run from the Pipelines view, Pipeline Details page, or the Topology view.
Procedure
To start a Pipeline using the Pipelines view:
-
In the Pipelines view of the Developer perspective, click the Options
 menu adjoining a Pipeline, and select Start.
The Start Pipeline dialog box displays the Git Resources and the Image Resources based on the Pipeline definition.
注意For Pipelines created using the From Git option, the Start Pipeline dialog box also displays an
APP_NAMEfield in the Parameters section, and all the fields in the dialog box are prepopulated by the Pipeline templates.- If you have resources in your namespace, the Git Resources and the Image Resources fields are prepopulated with those resources. If required, use the drop-downs to select or create the required resources and customize the Pipeline Run instance.
Optional: Modify the Advanced Options to add credentials to authenticate the specified private Git server or Docker registry.
- Under Advanced Options, click Show Credentials Options and select Add Secret.
In the Create Source Secret section, specify the following:
- A unique Secret Name for the secret.
- In the Designated provider to be authenticated section, specify the provider to be authenticated in the Access to field, and the base Server URL.
Select the Authentication Type and provide the credentials:
For the Authentication Type
Image Registry Crendentials, specify the Registry Server Address that you want to authenticate, and provide your credentials in the Username, Password, and Email fields.Select Add Credentials if you want to specify an additional Registry Server Address.
-
For the Authentication Type
Basic Authentication, specify the values for the UserName and Password or Token fields. -
For the Authentication Type
SSH Keys, specify the value for the SSH Private Key field.
- Select the check mark to add the secret.
You can add multiple secrets based upon the number of resources in your Pipeline.
- Click Start to start the PipelineRun.
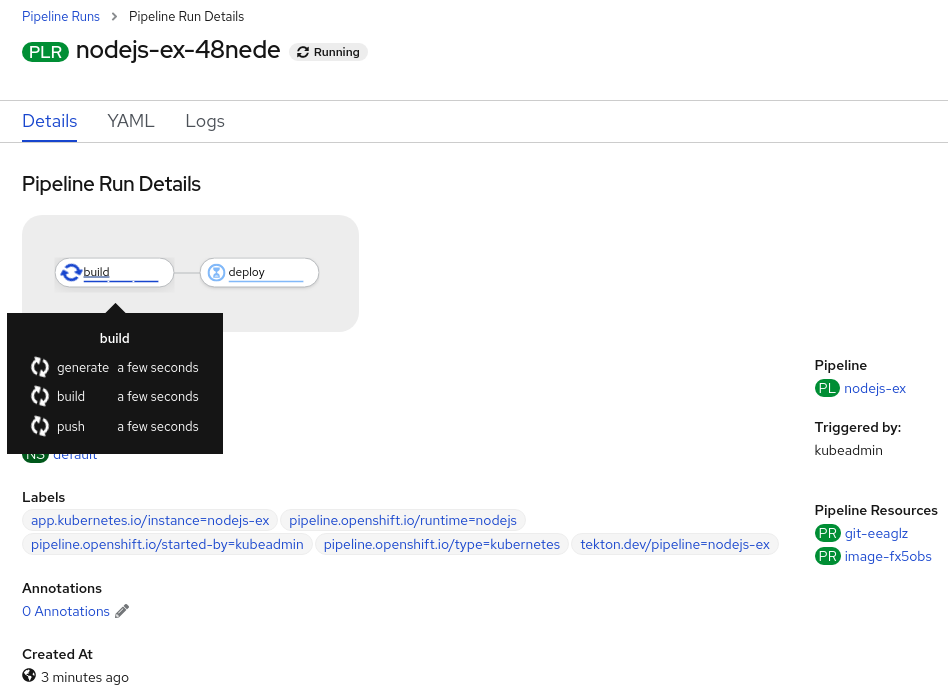
The Pipeline Run Details page displays the Pipeline being executed. After the Pipeline starts, the Tasks and Steps within each Task are executed. You can:
- Hover over the Tasks to see the time taken for the execution of each Step.
- Click on a Task to see logs for each of the Steps in the Task.
Click the Logs tab to see the logs according to the execution sequence of the Tasks and use the Download button to download the logs to a text file.
图 5.4. Pipeline run

For Pipelines created using the From Git option, you can use the Topology view to interact with Pipelines after you start them:
注意To see Pipelines created using the Pipeline Builder in the Topology view, customize the Pipeline labels to link the Pipeline with the application workload.
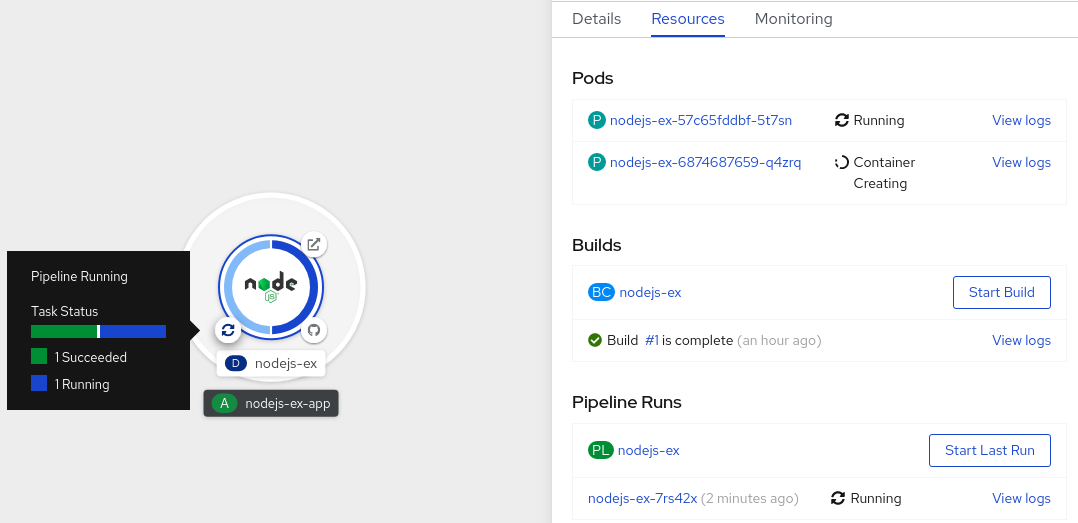
- On the left navigation panel, click Topology, and click on the application to see the Pipeline Runs listed in the side panel.
In the Pipeline Runs section, click Start Last Run to start a new Pipeline Run with the same parameters and resources as the previous ones. This option is disabled if a Pipeline Run has not been initiated.
图 5.5. Pipelines on the Topology view

- In the Topology page, hover to the left of the application to see the status of the Pipeline Run for the application.