Ce contenu n'est pas disponible dans la langue sélectionnée.
Chapter 1. Creating a cluster workshop
1.1. Creating a cluster
Follow this workshop to deploy a sample Red Hat OpenShift Service on AWS cluster, where you can set up the prerequisites such as ROSA command-line interface (CLI) (rosa), and create an admin user. You can then use your cluster in the next workshops.
1.1.1. Workshop objectives
This workshop teaches you how to create a cluster along with all of the needed prerequisites.
Learn to create your cluster prerequisites:
- Create a sample virtual private cloud (VPC)
- Create sample OpenID Connect (OIDC) resources
- Create sample environment variables
- Deploy a sample Red Hat OpenShift Service on AWS cluster
1.1.1.1. Prerequisites
- Red Hat OpenShift Service on AWS version 1.2.31 or later
- Amazon Web Service (AWS) command-line interface (CLI)
-
ROSA command-line interface (CLI) (
rosa)
1.1.2. Creating a VPC
Before deploying a Red Hat OpenShift Service on AWS cluster, you must have both a VPC and OIDC resources. We will create these resources first. Red Hat OpenShift Service on AWS uses the bring your own VPC (BYO-VPC) model.
Procedure
Make sure your AWS CLI (
aws) is configured to use a region where Red Hat OpenShift Service on AWS is available. See the regions supported by the AWS CLI by running the following command:$ rosa list regions --hosted-cpCreate the VPC. For this workshop, the following script creates the VPC and its required components. It uses the region configured in your
awsCLI.#!/bin/bash set -e ########## # This script will create the network requirements for a ROSA cluster. This will be # a public cluster. This creates: # - VPC # - Public and private subnets # - Internet Gateway # - Relevant route tables # - NAT Gateway # # This will automatically use the region configured for the aws cli # ########## VPC_CIDR=10.0.0.0/16 PUBLIC_CIDR_SUBNET=10.0.1.0/24 PRIVATE_CIDR_SUBNET=10.0.0.0/24 # Create VPC echo -n "Creating VPC..." VPC_ID=$(aws ec2 create-vpc --cidr-block $VPC_CIDR --query Vpc.VpcId --output text) # Create tag name aws ec2 create-tags --resources $VPC_ID --tags Key=Name,Value=$CLUSTER_NAME # Enable dns hostname aws ec2 modify-vpc-attribute --vpc-id $VPC_ID --enable-dns-hostnames echo "done." # Create Public Subnet echo -n "Creating public subnet..." PUBLIC_SUBNET_ID=$(aws ec2 create-subnet --vpc-id $VPC_ID --cidr-block $PUBLIC_CIDR_SUBNET --query Subnet.SubnetId --output text) aws ec2 create-tags --resources $PUBLIC_SUBNET_ID --tags Key=Name,Value=$CLUSTER_NAME-public echo "done." # Create private subnet echo -n "Creating private subnet..." PRIVATE_SUBNET_ID=$(aws ec2 create-subnet --vpc-id $VPC_ID --cidr-block $PRIVATE_CIDR_SUBNET --query Subnet.SubnetId --output text) aws ec2 create-tags --resources $PRIVATE_SUBNET_ID --tags Key=Name,Value=$CLUSTER_NAME-private echo "done." # Create an internet gateway for outbound traffic and attach it to the VPC. echo -n "Creating internet gateway..." IGW_ID=$(aws ec2 create-internet-gateway --query InternetGateway.InternetGatewayId --output text) echo "done." aws ec2 create-tags --resources $IGW_ID --tags Key=Name,Value=$CLUSTER_NAME aws ec2 attach-internet-gateway --vpc-id $VPC_ID --internet-gateway-id $IGW_ID > /dev/null 2>&1 echo "Attached IGW to VPC." # Create a route table for outbound traffic and associate it to the public subnet. echo -n "Creating route table for public subnet..." PUBLIC_ROUTE_TABLE_ID=$(aws ec2 create-route-table --vpc-id $VPC_ID --query RouteTable.RouteTableId --output text) aws ec2 create-tags --resources $PUBLIC_ROUTE_TABLE_ID --tags Key=Name,Value=$CLUSTER_NAME echo "done." aws ec2 create-route --route-table-id $PUBLIC_ROUTE_TABLE_ID --destination-cidr-block 0.0.0.0/0 --gateway-id $IGW_ID > /dev/null 2>&1 echo "Created default public route." aws ec2 associate-route-table --subnet-id $PUBLIC_SUBNET_ID --route-table-id $PUBLIC_ROUTE_TABLE_ID > /dev/null 2>&1 echo "Public route table associated" # Create a NAT gateway in the public subnet for outgoing traffic from the private network. echo -n "Creating NAT Gateway..." NAT_IP_ADDRESS=$(aws ec2 allocate-address --domain vpc --query AllocationId --output text) NAT_GATEWAY_ID=$(aws ec2 create-nat-gateway --subnet-id $PUBLIC_SUBNET_ID --allocation-id $NAT_IP_ADDRESS --query NatGateway.NatGatewayId --output text) aws ec2 create-tags --resources $NAT_IP_ADDRESS --resources $NAT_GATEWAY_ID --tags Key=Name,Value=$CLUSTER_NAME sleep 10 echo "done." # Create a route table for the private subnet to the NAT gateway. echo -n "Creating a route table for the private subnet to the NAT gateway..." PRIVATE_ROUTE_TABLE_ID=$(aws ec2 create-route-table --vpc-id $VPC_ID --query RouteTable.RouteTableId --output text) aws ec2 create-tags --resources $PRIVATE_ROUTE_TABLE_ID $NAT_IP_ADDRESS --tags Key=Name,Value=$CLUSTER_NAME-private aws ec2 create-route --route-table-id $PRIVATE_ROUTE_TABLE_ID --destination-cidr-block 0.0.0.0/0 --gateway-id $NAT_GATEWAY_ID > /dev/null 2>&1 aws ec2 associate-route-table --subnet-id $PRIVATE_SUBNET_ID --route-table-id $PRIVATE_ROUTE_TABLE_ID > /dev/null 2>&1 echo "done." # echo "***********VARIABLE VALUES*********" # echo "VPC_ID="$VPC_ID # echo "PUBLIC_SUBNET_ID="$PUBLIC_SUBNET_ID # echo "PRIVATE_SUBNET_ID="$PRIVATE_SUBNET_ID # echo "PUBLIC_ROUTE_TABLE_ID="$PUBLIC_ROUTE_TABLE_ID # echo "PRIVATE_ROUTE_TABLE_ID="$PRIVATE_ROUTE_TABLE_ID # echo "NAT_GATEWAY_ID="$NAT_GATEWAY_ID # echo "IGW_ID="$IGW_ID # echo "NAT_IP_ADDRESS="$NAT_IP_ADDRESS echo "Setup complete." echo "" echo "To make the cluster create commands easier, please run the following commands to set the environment variables:" echo "export PUBLIC_SUBNET_ID=$PUBLIC_SUBNET_ID" echo "export PRIVATE_SUBNET_ID=$PRIVATE_SUBNET_ID"The script outputs commands. Set the commands as environment variables to store the subnet IDs for later use. Run the following commands:
$ export PUBLIC_SUBNET_ID=$PUBLIC_SUBNET_ID
$ export PRIVATE_SUBNET_ID=$PRIVATE_SUBNET_ID
Confirm your environment variables by running the following command:
$ echo "Public Subnet: $PUBLIC_SUBNET_ID"; echo "Private Subnet: $PRIVATE_SUBNET_ID"For example:
Public Subnet: subnet-0faeeeb0000000000
Private Subnet: subnet-011fe340000000000
1.1.2.1. Creating your OIDC configuration
In this workshop, we will use the automatic mode when creating the OIDC configuration. We will also store the OIDC ID as an environment variable for later use. The command uses the ROSA CLI to create your cluster’s unique OIDC configuration.
Procedure
Create the OIDC configuration by running the following command:
$ export OIDC_ID=$(rosa create oidc-config --mode auto --managed --yes -o json | jq -r '.id')
1.1.3. Creating additional environment variables
To simplify your command-line execution and reduce repetitive typing, configure environment variables for your cluster deployments. Using these variables makes it faster and more efficient to run the command to create a Red Hat OpenShift Service on AWS cluster.
Procedure
Run the following command to set up environment variables:
$ export CLUSTER_NAME=<cluster_name> $ export REGION=<VPC_region>TipRun
rosa whoamito find the VPC region.
1.1.4. Creating a cluster
To deploy and manage containerized applications in a cloud environment, create a Red Hat OpenShift Service on AWS cluster. You can efficiently perform this installation process by using the ROSA CLI.
Procedure
Optional: Run the following command to create the account-wide roles and policies, including the Operator policies and the AWS IAM roles and policies:
ImportantOnly complete this step if this is the first time you are deploying Red Hat OpenShift Service on AWS in this account and you have not yet created your account roles and policies.
$ rosa create account-roles --mode auto --yesRun the following command to create the cluster:
$ rosa create cluster --cluster-name $CLUSTER_NAME \
--subnet-ids ${PUBLIC_SUBNET_ID},${PRIVATE_SUBNET_ID} \
--hosted-cp \
--region $REGION \
--oidc-config-id $OIDC_ID \
--sts --mode auto --yes
The cluster is ready after about 10 minutes. The cluster will have a control plane across three AWS availability zones in your selected region and create two worker nodes in your AWS account.
1.1.5. Checking the installation status
To verify that your environment is operating correctly and to monitor the health of your deployments, youu can check the status of your cluster. You can quickly perform this check by using the ROSA command-line interface (CLI) (rosa).
Procedure
Run one of the following commands to check the status of the cluster:
For a detailed view of the cluster status, run:
$ rosa describe cluster --cluster $CLUSTER_NAMEFor an abridged view of the cluster status, run:
$ rosa list clustersTo watch the log as it progresses, run:
$ rosa logs install --cluster $CLUSTER_NAME --watch
- Once the state changes to “ready” your cluster is installed. It might take a few more minutes for the worker nodes to come online.
1.2. Creating an admin user
Creating an administration (admin) user provides several key capabilities for cluster management and allows you to access your cluster quickly. Follow these steps to create an admin user.
1.2.1. Creating an admin user using the CLI
You can use the ROSA command-line interface (CLI) (rosa) to create an admin user for your clusters. Admin users can create new clusters, schedule cluster upgrades, monitor health, manage cluster resources, and so on.
An admin user works well in this tutorial setting. For actual deployment, use a formal identity provider to access the cluster and grant the user admin privileges. For more information on identity providers, see the Additional resources section.
Procedure
Run the following command to create the admin user:
$ rosa create admin --cluster=<cluster-name>Example output:
W: It is recommended to add an identity provider to login to this cluster. See 'rosa create idp --help' for more information.
I: Admin account has been added to cluster 'my-rosa-cluster'. It may take up to a minute for the account to become active.
I: To login, run the following command:
oc login https://api.my-rosa-cluster.abcd.p1.openshiftapps.com:6443 \
--username cluster-admin \
--password FWGYL-2mkJI-00000-00000
Copy the log in command returned to you in the previous step and paste it into your terminal. This will log you in to the cluster using the CLI so you can start using the cluster.
$ oc login https://api.my-rosa-cluster.abcd.p1.openshiftapps.com:6443 \
>    --username cluster-admin \
>    --password FWGYL-2mkJI-00000-00000
Example output:
Login successful.

You have access to 79 projects, the list has been suppressed. You can list all projects with ' projects'

Using project "default".
To check that you are logged in as the admin user, run one of the following commands:
Option 1:
$ oc whoamiFor example:
cluster-adminOption 2:
oc get all -n openshift-apiserverOnly an admin user can run this command without errors.
1.3. Setting up an identity provider
To log in to your cluster, set up an identity provider (IDP). This tutorial uses GitHub as an example IDP. See the full list of IDPs supported by Red Hat OpenShift Service on AWS.
1.3.1. Viewing IDP options
To determine which authentication methods are available for your cluster’s users, view your identity provider (IDP) options. You can quickly list these supported configurations by using the ROSA CLI.
Procedure
Before creating your IDP, you can view all IDP options by running the following command:
$ rosa create idp --help
1.3.2. Setting up an IDP with GitHub
To streamline the login process and allow users to authenticate with their existing credentials, configure GitHub as an identity provider. This integration simplifies access management across your organization by centralizing user authentication.
Procedure
- Log in to your GitHub account.
Create a new GitHub organization where you are an administrator.
TipIf you are already an administrator in an existing organization and you want to use that organization, skip to step 9.
Click the + icon, then click New Organization.

- Choose the most applicable plan for your situation or click Join for free.
Enter an organization account name, an email, and whether it is a personal or business account. Then, click Next.

- Optional: Add the GitHub IDs of other users to grant additional access to your Red Hat OpenShift Service on AWS cluster. You can also add them later.
- Click Complete Setup.
- Optional: Enter the requested information on the following page.
- Click Submit.
Go back to the terminal and enter the following command to set up the GitHub IDP:
rosa create idp --cluster=<cluster name> --interactiveEnter the following values:
Type of identity provider: github
Identity Provider Name: <IDP-name>
Restrict to members of: organizations
GitHub organizations: <organization-account-name>
The CLI will provide you with a link. Copy and paste the link into a browser and press Enter. This will fill the required information to register this application for OAuth. You do not need to modify any of the information.
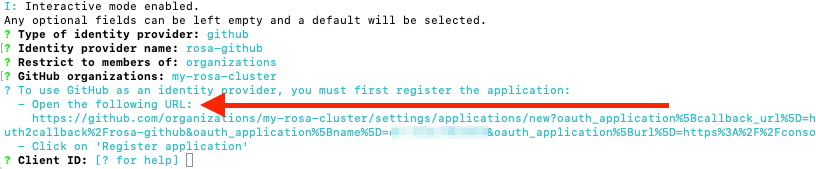
Click Register application.

The next page displays a Client ID. Copy the ID and paste it in the terminal where it asks for Client ID.
NoteDo not close the tab.
The CLI will ask for a Client Secret. Go back in your browser and click Generate a new client secret.
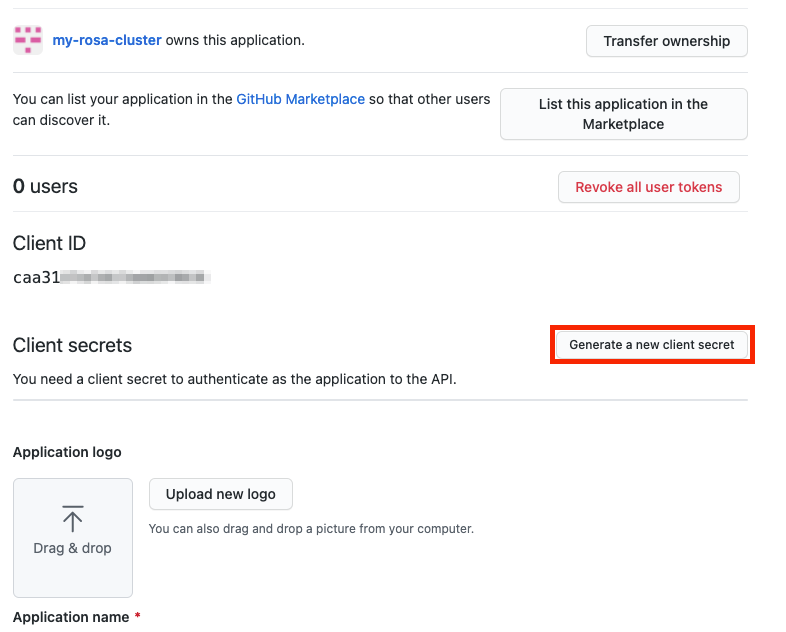
- A secret is generated for you. Copy your secret because it will never be visible again.
- Paste your secret into the terminal and press Enter.
- Leave GitHub Enterprise Hostname blank.
- Select claim.
Wait approximately 1 minute for the IDP to be created and the configuration to land on your cluster.

Copy the returned link and paste it into your browser. The new IDP should be available under your chosen name. Click your IDP and use your GitHub credentials to access the cluster.

1.3.3. Granting other users access to the cluster
To grant access to other cluster users, you will need to add their GitHub user ID to the GitHub organization used for this cluster.
Procedure
- In GitHub, go to the Your organizations page.
Click your profile icon, then Your organizations. Then click <your-organization-name>. In our example, it is
my-rosa-cluster.
Click Invite someone.

- Enter the GitHub ID of the new user, select the correct user, and click Invite.
- Once the new user accepts the invitation, they will be able to log in to the Red Hat OpenShift Service on AWS cluster using the Hybrid Cloud Console link and their GitHub credentials.
1.4. Granting admin privileges
Administration (admin) privileges are not automatically granted to users that you add to your cluster. If you want to grant admin-level privileges to certain users, you will need to manually grant them to each user. You can grant admin privileges from either the ROSA command-line interface (CLI) (rosa) or the Red Hat OpenShift Cluster Manager web user interface (UI).
1.4.1. Using the ROSA CLI
To allow specific users to manage your environment, you can use the ROSA CLI to grant administrative access to your user roles. Assigning these permissions ensures that authorized team members can effectively configure and monitor your cluster’s resources.
Red Hat offers two types of admin privileges:
-
cluster-admin:cluster-adminprivileges give the admin user full privileges within the cluster. -
dedicated-admin:dedicated-adminprivileges allow the admin user to complete most administrative tasks with certain limitations to prevent cluster damage. For best practice usededicated-adminwhen elevated privileges are needed.
Procedure
Assuming you are the user who created the cluster, run one of the following commands to grant admin privileges:
For
cluster-admin:$ rosa grant user cluster-admin --user <idp_user_name> --cluster=<cluster-name>For
dedicated-admin:$ rosa grant user dedicated-admin --user <idp_user_name> --cluster=<cluster-name>
Verify that the admin privileges were added by running the following command:
$ rosa list users --cluster=<cluster-name>Example output:
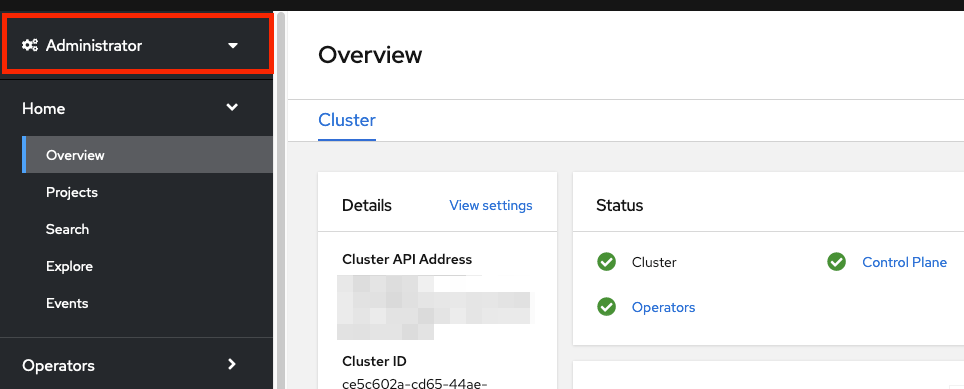
$ rosa list users --cluster=my-rosa-cluster
ID                 GROUPS
<idp_user_name>    cluster-admins
If you are currently logged into the Red Hat Hybrid Cloud Console, log out of the console and log back in to the cluster to see a new perspective with the "Administrator Panel". You might need an incognito or private window.
You can also test that admin privileges were added to your account by running the following command. Only a
cluster-adminusers can run this command without errors.$ oc get all -n openshift-apiserver
1.4.2. Using the Red Hat OpenShift Cluster Manager
You can grant cluster administrative access by using the OpenShift Cluster Manager. Users with administrative access can create new clusters, schedule cluster upgrades, monitor health, and manage cluster resources.
Procedure
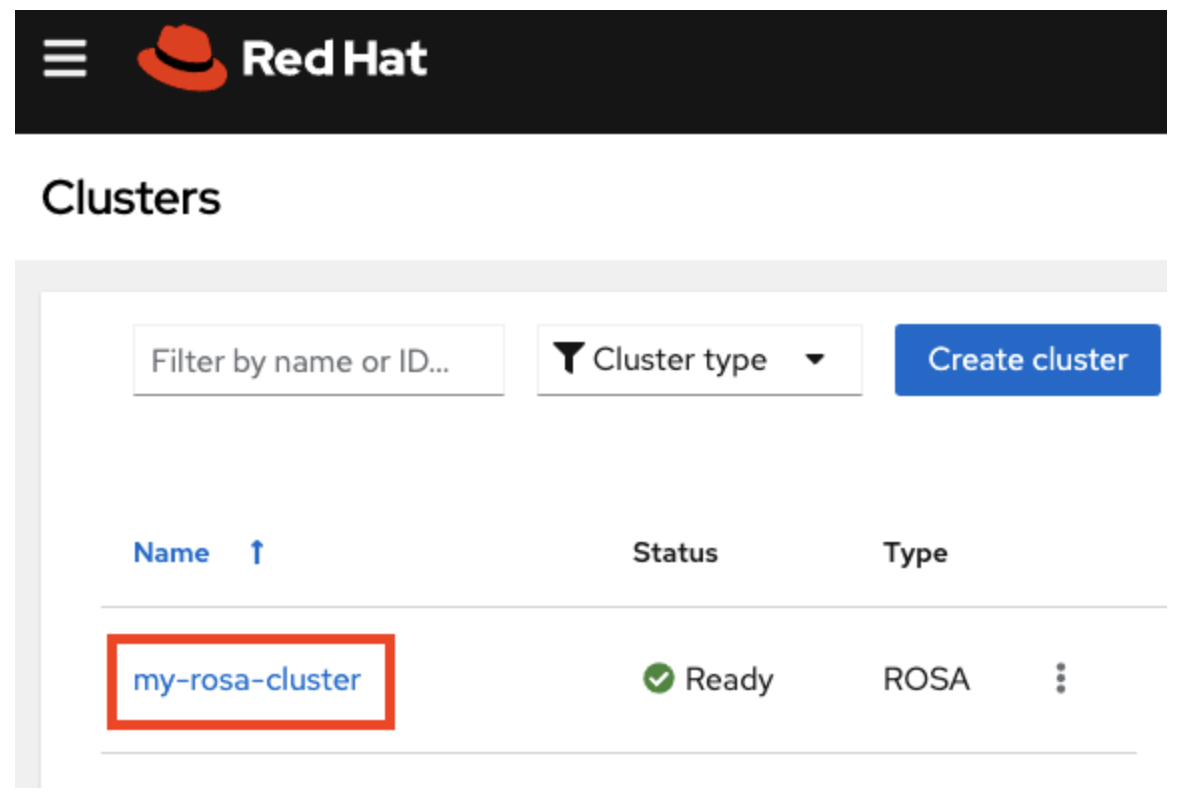
- Log in to the OpenShift Cluster Manager.
- Select your cluster.
- Click the Access control tab.
- Click the Cluster roles and Access tab in the sidebar.
Click Add user.

- On the pop-up screen, enter the user ID.
Select whether you want to grant the user
cluster-adminsordedicated-adminsprivileges.
1.5. Accessing your cluster
You can connect to your cluster using the ROSA command-line interface (CLI) (rosa) or the Red Hat Hybrid Cloud Console user interface (UI). You can use the ROSA CLI to authenticate with your service account credentials, and the Red Hat Hybrid Cloud Console to connect by using a user ID and password that you retrieve through the console.
1.5.1. Accessing your cluster using the CLI
To access the cluster using the CLI, you must have the oc CLI installed. With the oc CLI, you can work directly with project source code, and manage projects in bandwidth-restricted environments where the web console might be unavailable. If you are following the tutorials, you already installed the oc CLI.
Procedure
- Log in to the OpenShift Cluster Manager.
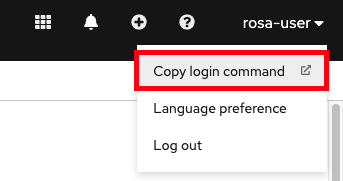
- Click your username in the top right corner.
Click Copy Login Command.
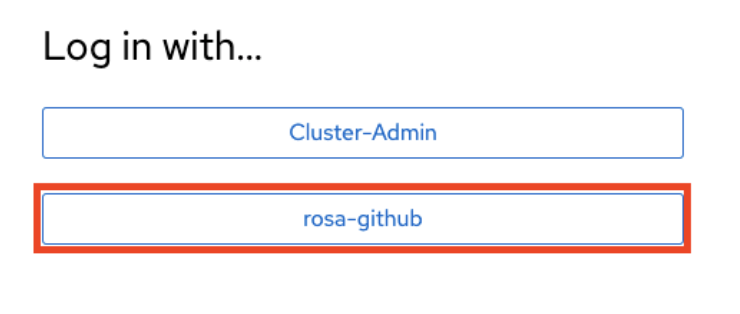
This opens a new tab with a choice of identity providers (IDPs). Click the IDP you want to use. For example, "rosa-github".
- A new tab opens. Click Display token.
Run the following command in your terminal:
$ oc login --token=sha256~GBAfS4JQ0t1UTKYHbWAK6OUWGUkdMGz000000000000 --server=https://api.my-rosa-cluster.abcd.p1.openshiftapps.com:6443Example output:
Logged into "https://api.my-rosa-cluster.abcd.p1.openshiftapps.com:6443" as "rosa-user" using the token provided.

You have access to 79 projects, the list has been suppressed. You can list all projects with ' projects'

Using project "default".
Confirm that you are logged in by running the following command:
$ oc whoamiExample output:
rosa-user- You can now access your cluster.
1.5.2. Accessing the cluster via the Hybrid Cloud Console
You can access your cluster by using the Hybrid Cloud Console, which serves as a primary portal for managing Red Hat OpenShift Service on AWS environments. Use Hybrid Cloud Console to access tools for cluster provisioning, registration, and health monitoring.
Procedure
- Log in to the OpenShift Cluster Manager.
To retrieve the Hybrid Cloud Console URL run:
$ rosa describe cluster -c <cluster-name> | grep ConsoleClick your IDP. For example, "rosa-github".
- Enter your user credentials.
You should be logged in. If you are following the tutorials, you will be a cluster-admin and should see the Hybrid Cloud Console webpage with the Administrator panel visible.

1.6. Managing worker nodes
In Red Hat OpenShift Service on AWS, changing aspects of your worker nodes is performed through the use of machine pools. A machine pool allows users to manage many machines as a single entity. Every Red Hat OpenShift Service on AWS cluster has a default machine pool that is created when the cluster is created. You can create your machine pools using ROSA command-line interface (CLI) (rosa) or within OpenShift Cluster Manager.
1.6.1. Creating a machine pool with the ROSA CLI
You can use the ROSA CLI to create a machine pool.
Procedure
Run the following command:
$ rosa create machinepool --cluster=<cluster-name> --name=<machinepool-name> --replicas=<number-nodes>For example:
 $ rosa create machinepool --cluster=my-rosa-cluster --name=new-mp
 --replicas=2
Example output:
I: Machine pool 'new-mp' created successfully on cluster 'my-rosa-cluster'
I: To view all machine pools, run 'rosa list machinepools -c my-rosa-cluster'
Optional: Add node labels or taints to specific nodes in a new machine pool by running the following command:
$ rosa create machinepool --cluster=<cluster-name> --name=<machinepool-name> --replicas=<number-nodes> --labels=`<key=pair>`For example:
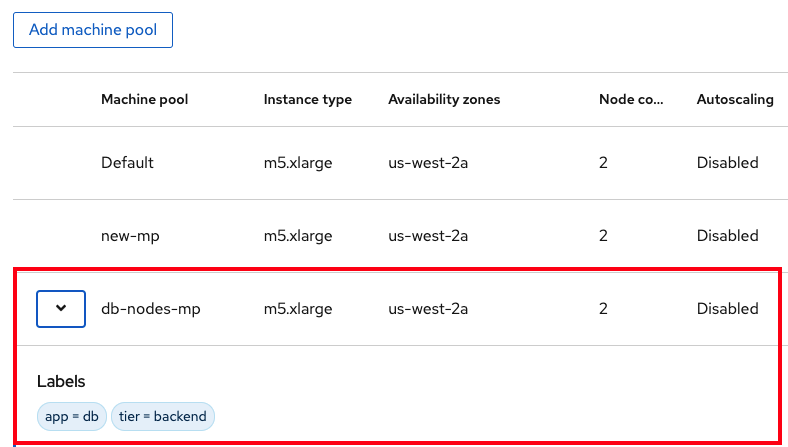
$ rosa create machinepool --cluster=my-rosa-cluster --name=db-nodes-mp --replicas=2 --labels='app=db','tier=backend'Example output:
I: Machine pool 'db-nodes-mp' created successfully on cluster 'my-rosa-cluster'This creates an additional 2 nodes that can be managed as a unit and also assigns them the labels shown.
Run the following command to confirm machine pool creation and the assigned labels:
$ rosa list machinepools --cluster=<cluster-name>Example output:
ID       AUTOSCALING  REPLICAS  INSTANCE TYPE  LABELS    TAINTS    AVAILABILITY ZONE  SUBNET                    DISK SIZE  VERSION  AUTOREPAIR
workers  Yes          2/2-4     m5.xlarge                          us-east-1f         subnet-<subnet_id>  300 GiB    4.14.36  Yes
1.6.2. Creating a machine pool with the UI
You can create your machine pools by using OpenShift Cluster Manager.
Procedure
Log in to the OpenShift Cluster Manager and click your cluster.
Click the Machine pools tab.

- Click Add machine pool.
Enter the desired configuration.
TipYou can also and expand the Edit node labels and taints section to add node labels and taints to the nodes in the machine pool.

- Click the Add machine pool button to save.
You will see the new machine pool you created.
1.6.3. Scaling worker nodes using the CLI
Edit a machine pool to scale the number of worker nodes in that specific machine pool by using ROSA CLI.
Procedure
Run the following command to see the default machine pool that is created with each cluster:
$ rosa list machinepools --cluster=<cluster-name>Example output:
ID          AUTOSCALING  REPLICAS  INSTANCE TYPE  LABELS            TAINTS    AVAILABILITY ZONES
Default     No           2         m5.xlarge                                  us-east-1a
To scale the default machine pool out to a different number of nodes, run the following command:
$ rosa edit machinepool --cluster=<cluster-name> --replicas=<number-nodes> <machinepool-name>For example:
$ rosa edit machinepool --cluster=my-rosa-cluster --replicas 3 DefaultRun the following command to confirm that the machine pool has scaled:
$ rosa describe cluster --cluster=<cluster-name> | grep ComputeFor example:
$ rosa describe cluster --cluster=my-rosa-cluster | grep ComputeExample output:
 - Compute (Autoscaled):    2-4
 - Compute (current):       2
1.6.4. Scaling worker nodes using the UI
Edit a machine pool to scale the number of worker nodes in that specific machine pool by using OpenShift Cluster Manager.
Procedure
- Click the three dots to the right of the machine pool you want to edit.
- Click Edit.
- Enter the desired number of nodes, and click Save.
Confirm that the cluster has scaled by selecting the cluster, clicking the Overview tab, and scrolling to Compute listing. The compute listing should equal the scaled nodes. For example, 3/3.

1.6.4.1. Adding node labels
To provide a description or extra information, you can add node labels to your machine pools by using the ROSA CLI.
Procedure
Use the following command to add node labels:
$ rosa edit machinepool --cluster=<cluster-name> --replicas=<number-nodes> --labels='key=value' <machinepool-name>For example:
$ rosa edit machinepool --cluster=my-rosa-cluster --replicas=2 --labels 'foo=bar','baz=one' new-mpThis adds 2 labels to the new machine pool.
ImportantThis command replaces all machine pool configurations with the newly defined configuration. If you want to add another label and keep the old label, you must state both the new and the preexisting label. Otherwise the command will replace all preexisting labels with the one you wanted to add. Similarly, if you want to delete a label, run the command and state the ones you want, excluding the one you want to delete.
1.6.5. Mixing node types
You can also mix different worker node machine types in the same cluster by using new machine pools. You cannot change the node type of a machine pool once it is created, but you can create a new machine pool with different nodes by adding the --instance-type flag.
Procedure
For example, to change the database nodes to a different node type, run the following command:
$ rosa create machinepool --cluster=<cluster-name> --name=<mp-name> --replicas=<number-nodes> --labels='<key=pair>' --instance-type=<type>For example:
$ rosa create machinepool --cluster=my-rosa-cluster --name=db-nodes-large-mp --replicas=2 --labels='app=db','tier=backend' --instance-type=m5.2xlargeTo see all the instance types available, run the following command:
$ rosa list instance-typesTo make step-by-step changes, use the
--interactiveflag:$ rosa create machinepool -c <cluster-name> --interactive
Run the following command to list the machine pools and see the new, larger instance type:
$ rosa list machinepools -c <cluster-name>
1.7. Autoscaling
Configure cluster autoscaling to improve performance and ensure that your environment dynamically adapts to changing workload demands. The cluster autoscaler adds or removes worker nodes from a cluster based on pod resources.
The cluster autoscaler increases the size of the cluster when:
- Pods fail to schedule on the current nodes due to insufficient resources.
- Another node is necessary to meet deployment needs.
It does not increase the cluster resources beyond the limits that you specify.
The cluster autoscaler decreases the size of the cluster when:
- Some nodes are consistently not needed for a significant period. For example, when a node has low resource use and all of its important pods can fit on other nodes.
1.7.1. Enabling autoscaling for an existing machine pool using the CLI
To ensure your environment dynamically adapts to changing workload demands, you can enable cluster autoscaling at cluster creation or when creating a new machine pool. To do this, use the --enable-autoscaling option.
Procedure
Autoscaling is set based on machine pool availability. To find out which machine pools are available for autoscaling, run the following command:
$ rosa list machinepools -c <cluster-name>For example:
ID       AUTOSCALING  REPLICAS  INSTANCE TYPE  LABELS    TAINTS    AVAILABILITY ZONE  SUBNET                    DISK SIZE  VERSION  AUTOREPAIR
workers  No           2/2       m5.xlarge                          us-east-1f         subnet-<subnet_id>  300 GiB    4.14.36  Yes
Run the following command to add autoscaling to an available machine pool:
$ rosa edit machinepool -c <cluster-name> --enable-autoscaling <machinepool-name> --min-replicas=<num> --max-replicas=<num>For example:
$ rosa edit machinepool -c my-rosa-cluster --enable-autoscaling workers --min-replicas=2 --max-replicas=4The above command creates an autoscaler for the worker nodes that scales between 2 and 4 nodes depending on the resources.
1.7.2. Enabling autoscaling for an existing machine pool using the UI
You can enable cluster autoscaling when creating a cluster to ensure your environment automatically adapts to workload demands. To do this, select the Enable autoscaling checkbox when you create machine pools.
Procedure
- Go to the Machine pools tab and click the three dots in the right..
- Click Edit, then Enable autoscaling.
- Edit the number of minimum and maximum node counts or leave the default numbers.
- Click Save.
Run the following command to confirm that autoscaling was added:
$ rosa list machinepools -c <cluster-name>For example:
ID       AUTOSCALING  REPLICAS  INSTANCE TYPE  LABELS    TAINTS    AVAILABILITY ZONE  SUBNET                    DISK SIZE  VERSION  AUTOREPAIR
workers  Yes          2/2-4     m5.xlarge                          us-east-1f         subnet-<subnet_id>  300 GiB    4.14.36  Yes
1.8. Upgrading your cluster
Red Hat OpenShift Service on AWS executes all cluster upgrades as part of the managed service. You do not need to run any commands or make changes to the cluster. You can schedule the upgrades at a convenient time.
Ways to schedule a cluster upgrade include:
- Manually using the command line interface (CLI): Start a one-time immediate upgrade or schedule a one-time upgrade for a future date and time.
- Manually using the Red Hat OpenShift Cluster Manager user interface (UI): Start a one-time immediate upgrade or schedule a one-time upgrade for a future date and time.
- Automated upgrades: Set an upgrade window for recurring y-stream upgrades whenever a new version is available without needing to manually schedule it. Minor versions have to be manually scheduled.
For more details about cluster upgrades, run the following command:
$ rosa upgrade cluster --help1.8.1. Manually upgrading your cluster using the CLI
You can upgrade your cluster by using ROSA CLI.
Procedure
Check if there is an upgrade available by running the following command:
$ rosa list upgrade -c <cluster-name>For example:
$ rosa list upgrade -c <cluster-name>
VERSION  NOTES
4.14.7   recommended
4.14.6
...
In the above example, versions 4.14.7 and 4.14.6 are both available.
Schedule the cluster to upgrade within the hour by running the following command:
$ rosa upgrade cluster -c --control-plane <cluster-name> --version <desired-version>Optional: Schedule the cluster to upgrade at a later date and time by running the following command:
$ rosa upgrade cluster -c <cluster-name> --version <desired-version> --schedule-date <future-date-for-update> --schedule-time <future-time-for-update>
1.8.2. Manually upgrading your cluster using the UI
You can upgrade your cluster using OpenShift Cluster Manager.
Procedure
- Log in to the OpenShift Cluster Manager, and select the cluster you want to upgrade.
- Click the Settings tab.
If an upgrade is available, click Update.

- Select the version to which you want to upgrade in the new window.
- Schedule a time for the upgrade or begin it immediately.
1.8.3. Setting up automatic recurring upgrades
To schedule your cluster to automatically receive new patch (z-stream) updates, you can set your cluster to upgrade on a recurring basis within OpenShift Cluster Manager.
Procedure
- Log in to the OpenShift Cluster Manager, and select the cluster you want to upgrade.
- Click the Settings tab.
- Under Update Strategy, click Recurring updates.
- Set the day and time for the upgrade to occur.
- Click Save.
1.9. Deleting your cluster
You might want to delete your Red Hat OpenShift Service on AWS cluster if you created it for testing purposes only or no longer need it for other reasons. You can delete your cluster using either the ROSA command-line interface (CLI) (rosa) or the user interface (UI).
1.9.1. Deleting a Red Hat OpenShift Service on AWS cluster using the ROSA CLI
To free up system resources and avoid unnecessary costs when an environment is no longer needed, you can delete your Red Hat OpenShift Service on AWS cluster. You can easily perform this complete removal process by using the ROSA command-line interface (CLI) (rosa).
Procedure
Optional: List your clusters to make sure you are deleting the correct one by running the following command:
$ rosa list clustersDelete a cluster by running the following command:
$ rosa delete cluster --cluster <cluster-name>WarningThis command is non-recoverable.
The CLI prompts you to confirm that you want to delete the cluster. Press y and then Enter. The cluster and all its associated infrastructure will be deleted.
NoteAll AWS Security Token Service (STS) and Identity and Access Managmenet (IAM) roles and policies will remain and must be deleted manually once the cluster deletion is complete by following the steps below.
The ROSA CLI outputs the commands to delete the OpenID Connect (OIDC) provider and Operator IAM roles resources that were created. Wait until the cluster finishes deleting before deleting these resources. Perform a quick status check by running the following command:
$ rosa list clustersOnce the cluster is deleted, delete the OIDC provider by running the following command:
$ rosa delete oidc-provider -c <clusterID> --mode auto --yesDelete the Operator IAM roles by running the following command:
$ rosa delete operator-roles -c <clusterID> --mode auto --yesNoteThis command requires the cluster ID and not the cluster name.
Only remove the remaining account roles if they are no longer needed by other clusters in the same account. If you want to create other Red Hat OpenShift Service on AWS clusters in this account, do not perform this step.
To delete the account roles, you need to know the prefix used when creating them. The default is "ManagedOpenShift" unless you specified otherwise.
Delete the account roles by running the following command:
$ rosa delete account-roles --prefix <prefix> --mode auto --yes
1.9.2. Deleting a Red Hat OpenShift Service on AWS cluster using the UI
To free up system resources when an environment is no longer needed, you can delete your Red Hat OpenShift Service on AWS cluster by using the OpenShift Cluster Manager.
Procedure
- Log in to the OpenShift Cluster Manager, and locate the cluster you want to delete.
Click the three dots to the right of the cluster.
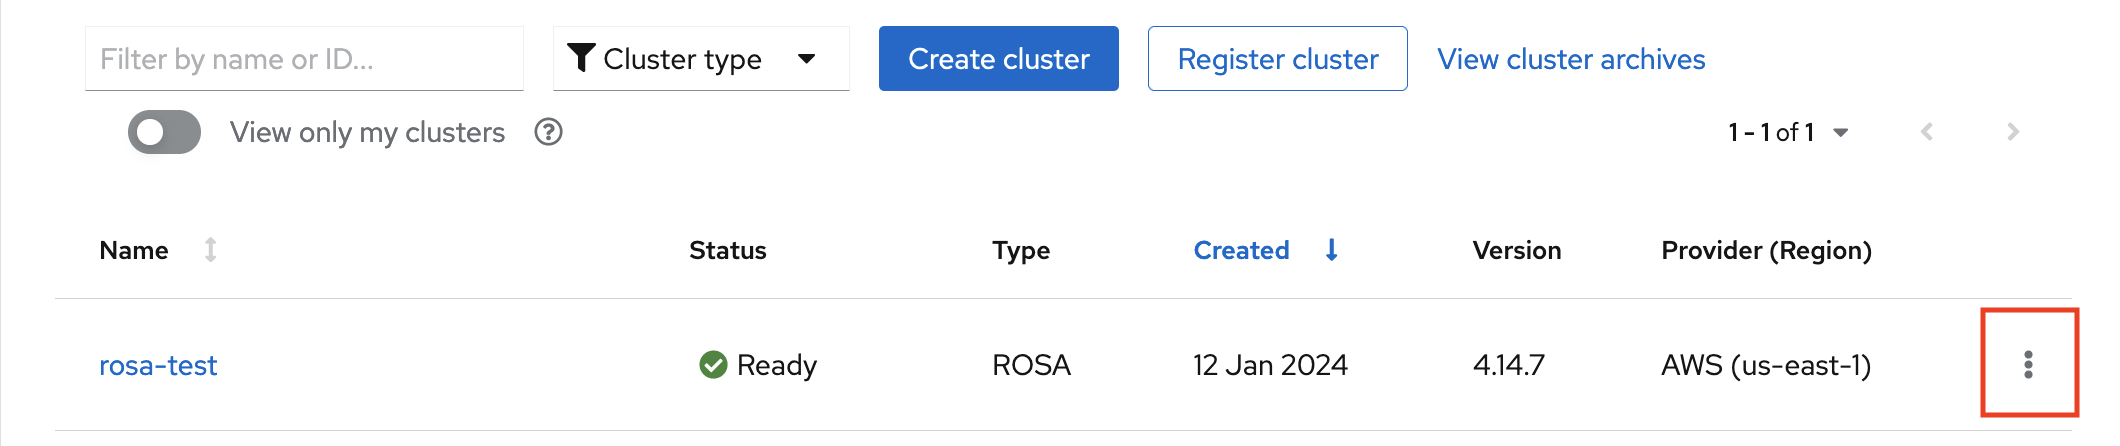
In the dropdown menu, click Delete cluster.

- Enter the name of the cluster to confirm deletion, and click Delete.
1.10. Obtaining support
Finding the right help when you need it is important. These are some of the resources at your disposal when you need assistance.
1.10.1. Adding support contacts
You can add additional email addresses for communications about your cluster.
Procedure
- On the Red Hat OpenShift Cluster Manager user interface (UI), click Cluster List in the side navigation tabs.
- Select the cluster that needs support.
- Click the Support tab.
- Click Add notification contact, and enter the additional email addresses.
1.10.2. Contacting Red Hat for support using the UI
You can request support within OpenShift Cluster Manager.
Procedure
- On the OpenShift Cluster Manager UI, click the Support tab.
- Click Open support case.
1.10.3. Contacting Red Hat for support using the support page
You can request Red Hat support using the support page.
Procedure
- Go to the Red Hat support page.
Click Open a new Case.

- Log in to your Red Hat account.
Select the reason for contacting support.
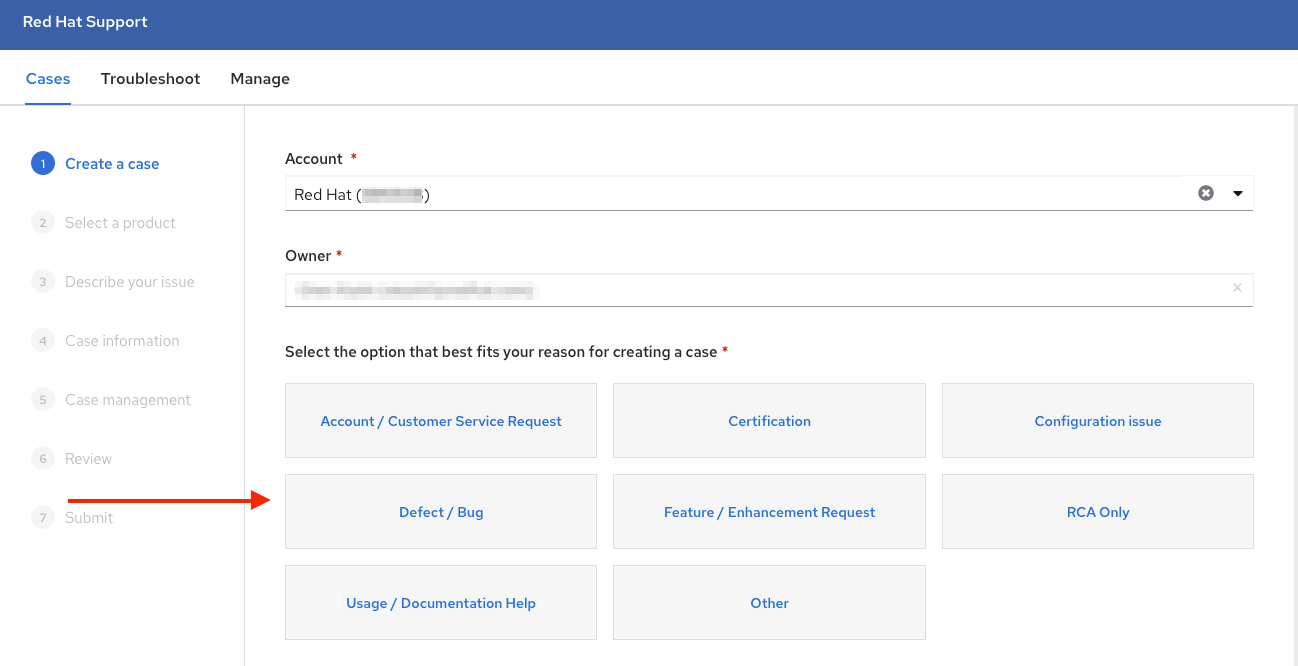
Select Red Hat OpenShift Service on AWS.

- Click continue.
Enter a summary of the issue and the details of your request. Upload any files, logs, and screenshots. The more details you provide, the better Red Hat support can help your case.
NoteRelevant suggestions that might help with your issue will appear at the bottom of this page.

- Click Continue.
- Answer the questions in the new fields.
- Click Continue.
Enter the following information about your case:
- Support level: Premium
- Severity: Review the Red Hat Support Severity Level Definitions to choose the correct one.
- Group: If this is related to a few other cases you can select the corresponding group.
- Language
- Send notifications: Add any additional email addresses to keep notified of activity.
- Red Hat associates: If you are working with anyone from Red Hat and want to keep them in the loop you can enter their email address here.
- Alternate Case ID: If you want to attach your own ID to it you can enter it here.
- Click Continue.
On the review screen make sure you select the correct cluster ID that you are contacting support about.

- Click Submit.
- You will be contacted based on the response time committed to for the indicated severity level.