This documentation is for a release that is no longer maintained
See documentation for the latest supported version 3 or the latest supported version 4.第2章 CLI の使用方法
2.1. 概要
OpenShift Container Platform の CLI は、アプリケーションを管理するためのコマンドだけでなく、システムの各コンポーネントと対話する低レベルのツールも公開しています。このトピックでは、インストールおよび最初のプロジェクトを作成するためのログインなど、CLI の使用方法について説明します。
2.2. 前提条件
特定の操作では、Git がクライアント上にローカルにインストールされている必要があります。たとえば、リモート Git リポジトリーを使用してアプリケーションを作成するコマンドは以下のようになります。
oc new-app https://github.com/<your_user>/<your_git_repo>
$ oc new-app https://github.com/<your_user>/<your_git_repo>ここで、Git をワークステーションにインストールします。お使いのワークステーションのオペレーティングシステムに応じたインストール方法については、Git の公式サイトの Git ドキュメント を参照してください。
2.3. CLI のインストール
CLI をダウンロードする最も簡単な方法として、Web コンソールの About ページにアクセスすることができます (クラスター管理者がダウンロードリンクを有効にしている場合)。
CLI のインストールオプションは、お使いのオペレーティングシステムによって異なります。
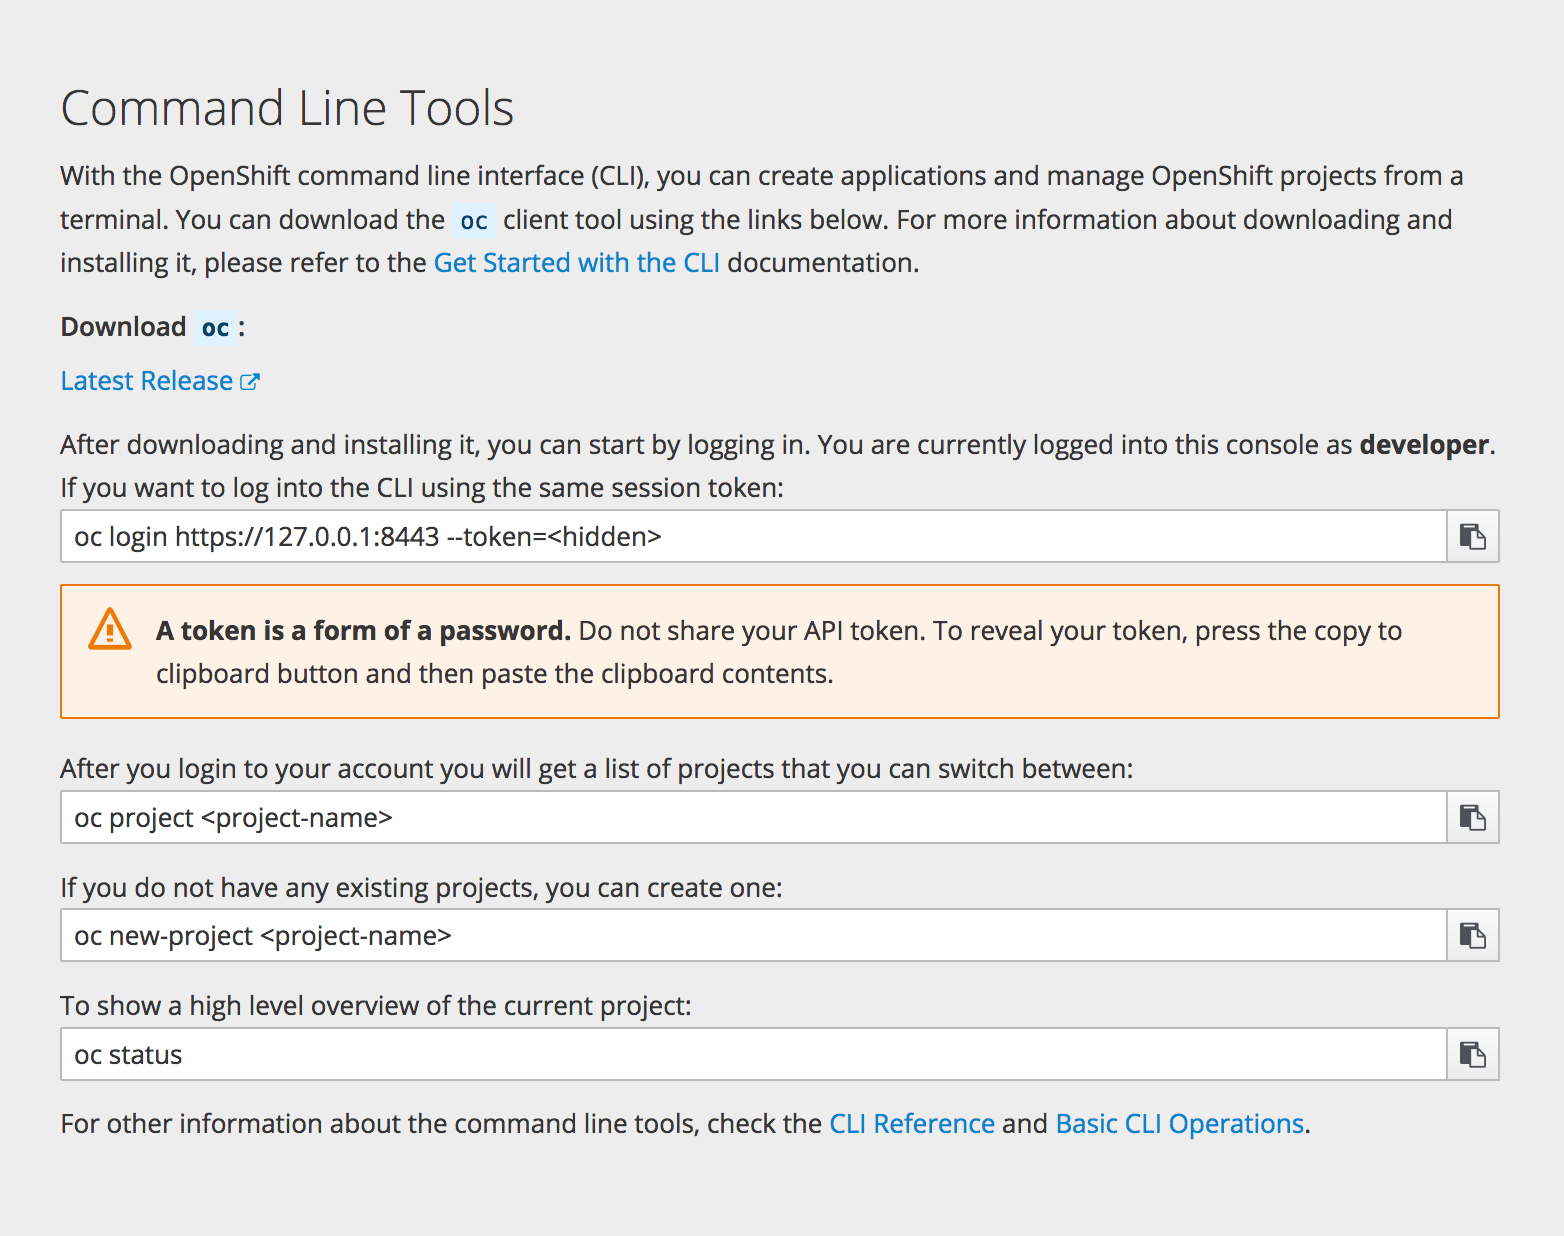
CLI を使用してログインする場合、Web コンソールの「Command Line」ページからトークンを取得します。このページには、「Help」メニューの「Command Line Tools」からアクセスできます。トークンは非表示になっているので、「Command Line Tools」ページにある oc login 行の端にある「copy to clipboard」ボタンをクリックし、コピーしたコンテンツを貼り付け、トークンを表示します。
2.3.1. Windows の場合
Windows 向けの CLI は、zip アーカイブとして提供されます。これは、Red Hat カスタマーポータル からダウンロードできます。Red Hat アカウントでログイン後、ダウンロードページにアクセスするには、有効な OpenShift Enterprise サブスクリプションが必要です。
Download the CLI from the Red Hat Customer Portal
または、クラスター管理者がリンクを有効にしている場合は、Web コンソールの About ページから CLI をダウンロードし、展開することができます。
チュートリアルの動画
以下の動画ではこのプロセスを紹介しています。視聴するには、ここをクリックしてください。
次に ZIP プログラムでアーカイブを展開し、oc バイナリーを PATH 上のディレクトリーに移動します。PATH を確認するには、コマンドプロンプトを開いて以下を実行します。
path
C:\> path2.3.2. Mac OS X の場合
Mac OS X 向けの CLI は、tar.gz アーカイブとして提供されます。これは Red Hat カスタマーポータル からダウンロードできます。Red Hat アカウントでログイン後、ダウンロードページにアクセスするには、有効な OpenShift Enterprise サブスクリプションが必要です。
Download the CLI from the Red Hat Customer Portal
または、クラスター管理者がリンクを有効にしている場合は、Web コンソールの About ページから CLI をダウンロードし、展開することができます。
チュートリアルの動画
以下の動画ではこのプロセスを紹介しています。視聴するには、ここをクリックしてください。
次にアーカイブを展開し、oc バイナリーを PATH 上のディレクトリーに移動します。PATH を確認するには、ターミナルのウィンドウを開いて以下を実行します。
echo $PATH
$ echo $PATH2.3.3. Linux の場合
Red Hat Enterprise Linux (RHEL) 7 の場合、Red Hat アカウントに有効な OpenShift Enterprise サブスクリプションがある場合、Red Hat Subscription Management (RHSM) を使用して RPM として CLI をインストールできます。
subscription-manager register
subscription-manager refresh
subscription-manager attach --pool=<pool_id>
subscription-manager repos --enable="rhel-7-server-ose-3.9-rpms"
yum install atomic-openshift-clients
# subscription-manager register
# subscription-manager refresh
# subscription-manager attach --pool=<pool_id>
# subscription-manager repos --enable="rhel-7-server-ose-3.9-rpms"
# yum install atomic-openshift-clients- 1
- 有効な OpenShift Enterprise サブスクリプションのプール ID
RHEL、Fedora その他 Linux ディストリビューションの場合、 CLI を Red Hat カスタマーポータル から tar.gz アーカイブとして直接ダウンロードできます。Red Hat アカウントでログイン後、ダウンロードページにアクセスするには、有効な OpenShift Enterprise サブスクリプションが必要です。
Download the CLI from the Red Hat Customer Portal
チュートリアルの動画
以下の動画ではこのプロセスを紹介しています。視聴するには、ここをクリックしてください。
または、クラスター管理者がリンクを有効にしている場合は、Web コンソールの About ページから CLI をダウンロードし、展開することができます。
次にアーカイブを展開し、oc バイナリーを PATH 上のディレクトリーに移動します。PATH を確認するには、以下を実行します。
echo $PATH
$ echo $PATHアーカイブを展開するには、以下を実行します。
tar -xf <file>
$ tar -xf <file>If you do not use RHEL or Fedora, ensure that libc is installed and on your library path. If libc is not available, you might see the following error when you run CLI commands:
oc: No such file or directory
oc: No such file or directory2.4. 基本的な設定およびログイン
CLI の初期設定を行う場合、oc login コマンドを使用することが最適な方法となり、このコマンドはほとんどのユーザーにとってのエントリーポイントとしての機能を果たします。対話型フローは、指定される認証情報を使用して OpenShift Container Platform サーバーへのセッションを確立するのに役立ちます。この情報は CLI 設定ファイル に自動的に保存され、その後のコマンドで使用されます。
以下の例では、oc login コマンドを使用した対話的な設定およびログインについて説明します。
例2.1 CLI の初期設定
CLI 設定が完了すると、その後のコマンドがサーバーの設定ファイル、セッショントークン、およびプロジェクト情報を使用します。
CLI からログアウトするには、以下の oc logout コマンドを使用します。
oc logout
User, alice, logged out of https://openshift.example.com
$ oc logout
User, alice, logged out of https://openshift.example.comプロジェクトの作成後か、またはプロジェクトへのアクセスが付与された後にログインする場合、アクセス可能なプロジェクトが現在のデフォルトとして自動的に設定されます。これは 別のプロジェクトに切り替える までデフォルトになります。
Additional options are also available for the oc login command.
If you have access to administrator credentials but are no longer logged in as the default system user system:admin, you can log back in as this user at any time as long as the credentials are still present in your CLI configuration file. The following command logs in and switches to the default project:
oc login -u system:admin -n default
$ oc login -u system:admin -n default2.5. CLI 設定ファイル
A CLI configuration file permanently stores oc options and contains a series of authentication mechanisms and OpenShift Container Platform server connection information associated with nicknames.
前のセクションで説明したように、oc login コマンドは、CLI 設定ファイルを自動的に作成し、管理します。このコマンドで収集されるすべての情報は、~/.kube/config にある設定ファイルに保存されます。現在の CLI 設定は、以下のコマンドを使用して表示することができます。
例2.2 CLI 設定の表示
CLI 設定ファイルは、さまざまな OpenShift Container Platform サーバー、namespace、およびユーザーを使用して「複数の CLI プロファイルを設定」するために使用できます。これらの設定ファイルは、コマンドラインで指定した上書きオプションと共に、ランタイム時に読み込まれ、マージされます。
2.6. プロジェクト
A project in OpenShift Container Platform contains multiple objects to make up a logical application.
Most oc commands run in the context of a project. The oc login selects a default project during initial setup to be used with subsequent commands. Use the following command to display the project currently in use:
oc project
$ oc project複数のプロジェクトにアクセスできる場合は、プロジェクト名を指定し、以下の構文を使って特定のプロジェクトに切り替えます。
oc project <project_name>
$ oc project <project_name>例:
oc status コマンドは、現在使用中のプロジェクトのハイレベルの概要を表示します。以下の例が示すように、プロジェクトのコンポーネントおよび関係性なども表示されます。
2.7. 次のステップ
After you have logged in, you can create a new application and explore some common CLI operations.


